TUESDAY, DECEMBER 16, 2008

OK, before you get all over me about being in the "real" world, just give me a minute to explain ;-)

I bought a set of plans for the Joli boat from Philip Thiel. Unfortunately, this is not the right "season" in my life to really start building a boat. So, should I just wait and dream, or should I make some kind of forward progress?

My intent here is to keep a journal of my progress. I'll be using Google Sketchup to build my virtual boat. I'm sure that along the way I'll run across problems that need solving, trouble keeping on task, and moments of inspiration.

I'll include pictures and video as I progress. Click on any picture if you'd like to see it larger.

Maybe I'm crazy, but follow along and see what you think

Friday, February 27, 2009

Goin’ 3D and a Twin Bed

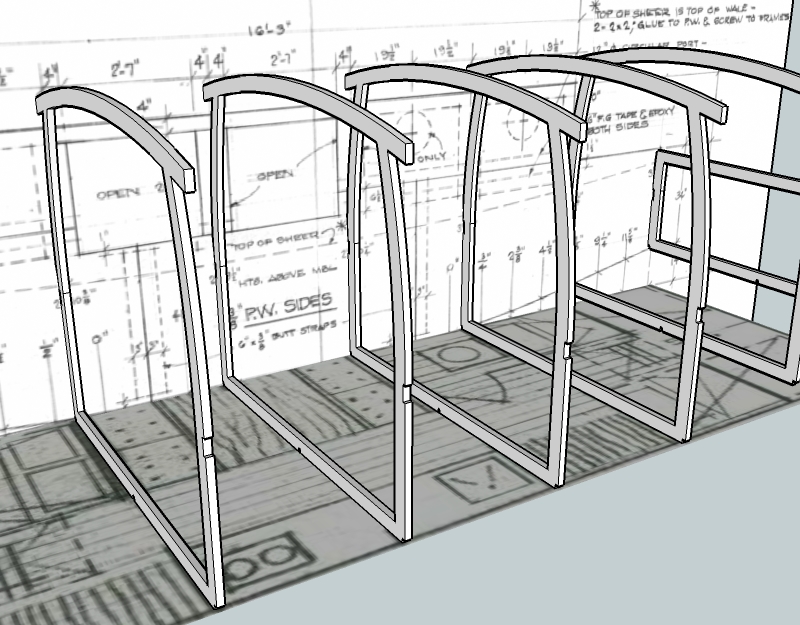
I’ve been working on my flat 2D plan in Sketchup and have started moving into that 3rd dimension. It has been fun to see my Joli start to take shape.

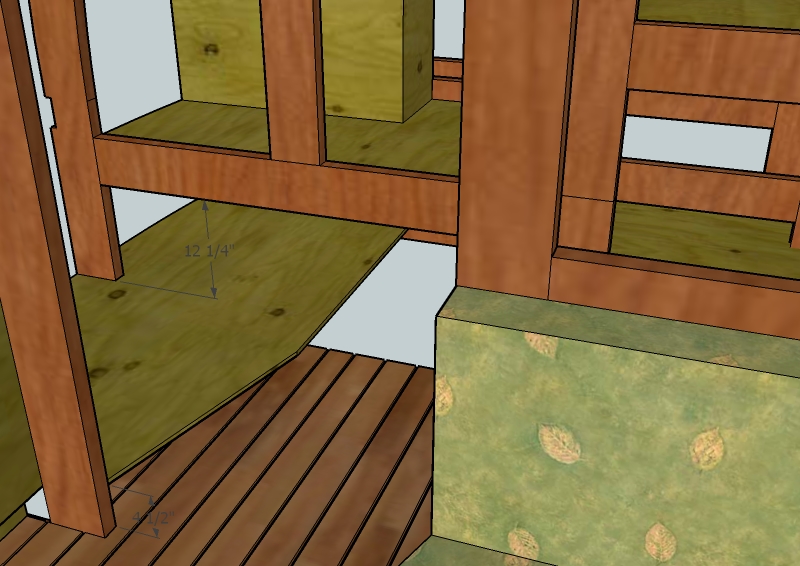
This process confirmed my suspicion that there is no good way to put single bunks in the rear of the boat. There would only be 12 1/4” of clearance from the top of the bed to the bottom of the frame, and this is with a bunk that is only 4 1/2” above the floor. If I add a cushion to the bunk, it gets tighter yet. Clearly this is not going to work.
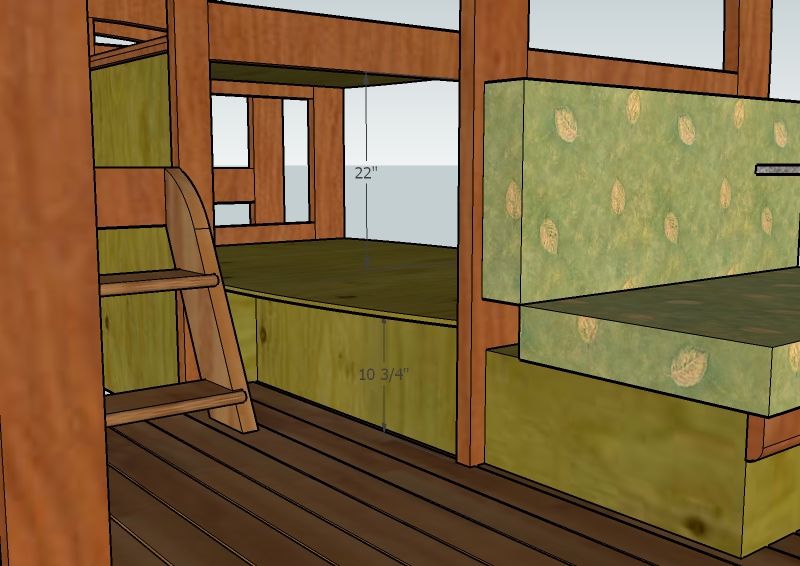
If I go back to Phillip’s original design for the rear bunk, I can have 22” of space. This should allow plenty of vertical room even with a nice cushion on the bed.

As an added benefit, the twin bed could be 10 3/4” above the floor. This will probably be more comfortable to get in or out of. The twin bed also allows a dinette that can be full width rather than cut at an angle to help with traffic flow.
I am concerned about the width of the twin bed. Since my Joli is 6” narrower than the original and mine tapers to a tight radius towards the rear, there isn’t much width available.
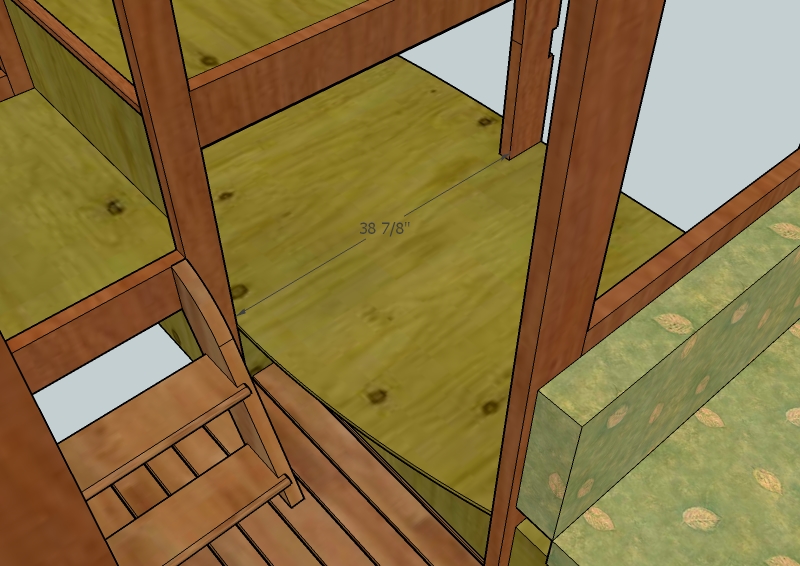
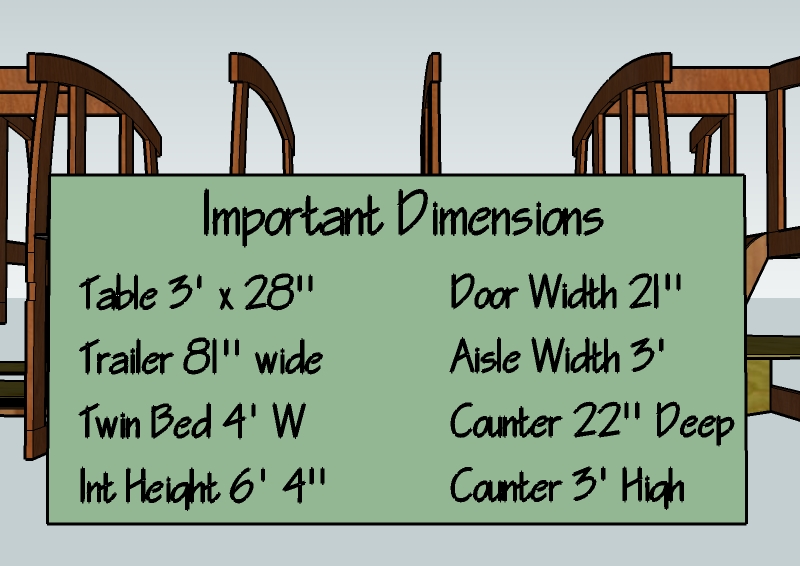
We have a vintage camp trailer that I took some key dimensions from. Our twin bed in the trailer is 48” wide. It’s only 38 7/8” in the boat. I don’t think there is any good way to increase this without compromising the hatchway width.

Here are a few other dimensions from our trailer. These certainly aren’t set in stone but they are dimensions that we’ve lived with while camping in our trailer.

I’ll end this entry with a video tour of my boat. The first half of the video shows the single bunks in the rear. It then transitions to the twin bed configuration. There’s so much more to do, but I’m sure pleased with this chance to explore ideas and solve problems without wasting wood.

Larger Video

I may feature some web sites and books in my next journal entry. Keep an eye out ;-)

“Two weeks on the river and I was only fifty miles upstream. My wake, had it been recorded, would have revealed a slow, wandering track of curiosity – islands explored, old townsites discovered, and unnamed channels followed. I had left footprints on sandbars, and on mudbanks I had left the imprint of the boat’s keel. These things, the small unexpected adventures, are the best part of a journey.”

Sam McKinney,

from Reach of Tide, Ring of History

Wednesday, February 18, 2009

The Joli Wee Spark

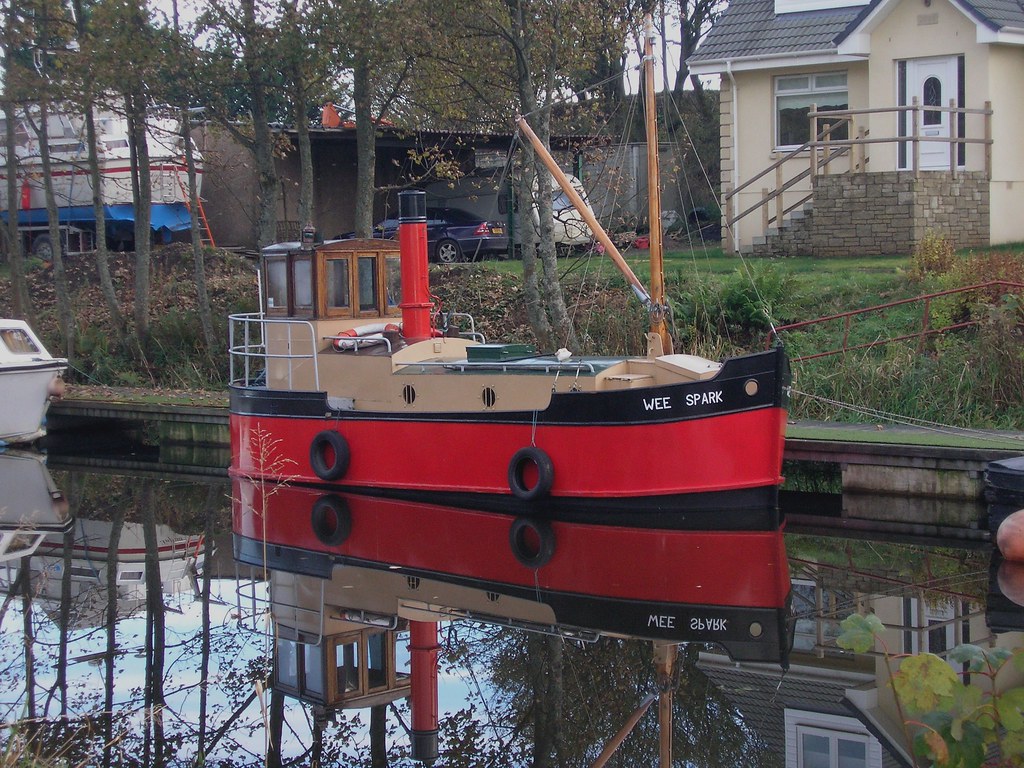
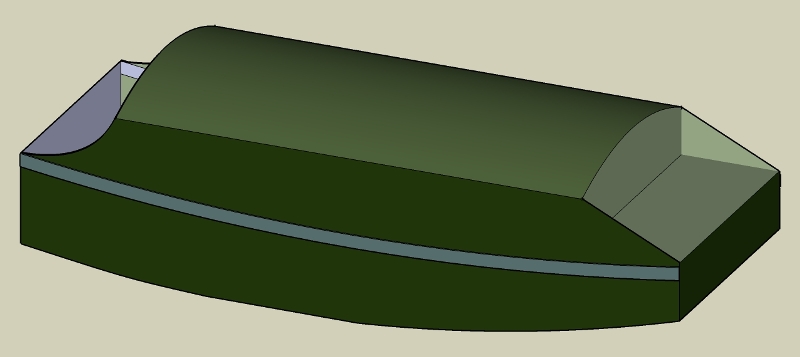
I’ve worked a little with the floor plan of the Joli to see if I could make it look a little more like a nautical boat. I’m using the basic hull shape from the Wee Spark that I introduced to you during our last visit. 

I tried to work within the confines of my revised frame locations based on my extended length version of the Joli. I left the original width on as many frames as possible and only the ones on the end get modified.
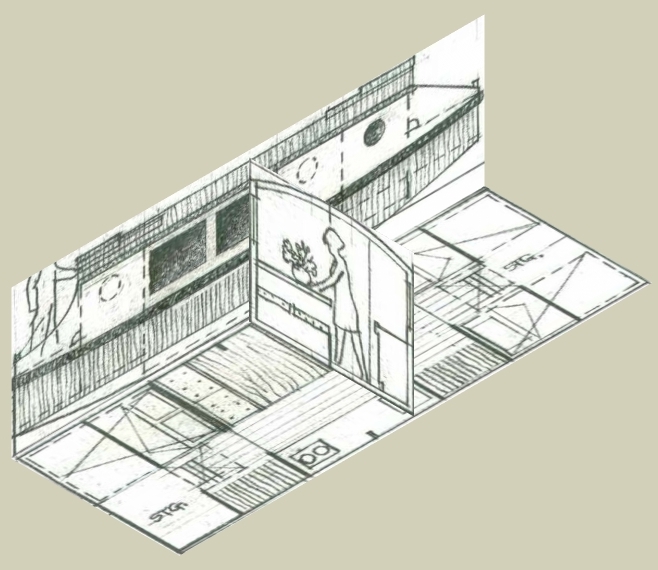
It looks like the rounded transom will work fine as it still hides the outboard motor. The rear bunks get narrower right towards the foot end, but that should be fine.

The bunks in the front are more severely affected by this hull shape change. The forward bunks are now a modified V berth. I did lose some overall width but I think they’re still within reason. It looks like they will tuck under the front ladder. 

Larger Video

I may be exceeding the abilities of Sketchup with this modified shape so I’ve downloaded the newest free version of DELFTship and may try again to learn this software. It really is a better tool for boat designing. We’ll see. Here’s a version of the Clyde Puffer done with DELFTship. The Puffer is the original ship that the Wee Spark is based on.

Here’s another example of what is possible in DELFTship.

I haven’t given up on Sketchup yet. Look at how complex this hull shape is. I guess I need a little more practice ;-)

Now let me complicate the options a little further. There is also a program called FREE!ship. This software is produced by the original developer of DELFTship, Martijn Van Engeland. There is a nice tutorial at the Wooden Boat Forum if you’re interested in pursuing this further. Here is another tutorial for FREE!ship.

It also seems that models built in DELFTship or FREE!ship can be exported and used in Sketchup. See an example here

Wow, so much to learn!

Wednesday, February 11, 2009

Hull Shape

The Joli is shaped like a barge or a scow. This has at least two great advantages. It’s easier to build with flat sides and a flat bottom as well as providing enormous interior space. Ok, maybe enormous is a bit of an exaggeration, but compared to lets say a sailboat, the Joli has much more room in the same 23 feet.

I am concerned however, about two things that I see as a disadvantage. A flat bottom hull doesn’t move through the water but rather over the water. This tends to create a slapping sound when encountering waves. Now I know that Philip designed the Joli boat for calm waters so this may not be an issue. I plan to use the boat for camping at our many mountain lakes here in Central Oregon. I also intend to do some cruising on our larger rivers in Oregon, However; even on lakes and rivers, I’ll encounter waves from wind, tides, current, and other boaters. This slapping sound may interfere with an otherwise relaxing weekend. Secondly, and perhaps less important, has something to do with vanity. I want people to admire my “Yacht”. I think it should look like a “real” boat. Now this may not be fair to Mr. Thiel at all and it might reveal a character flaw on my part, but there it is, out in the open.

So what! Do I try to do something about this? Why make it harder to build? Why take away precious interior space? Because of this wonderful boat that Bryan Lowe found for me:


I just love how this boat looks. It makes me smile inside and out. I can just imagine how wonderful it would be to motor around in the Wee Spark. Could I modify the Joli hull somewhat to resemble this scale replica of an old canal workboat? Maybe I should start with Philip’s newest design, the Friend-Ship.

Larger Video

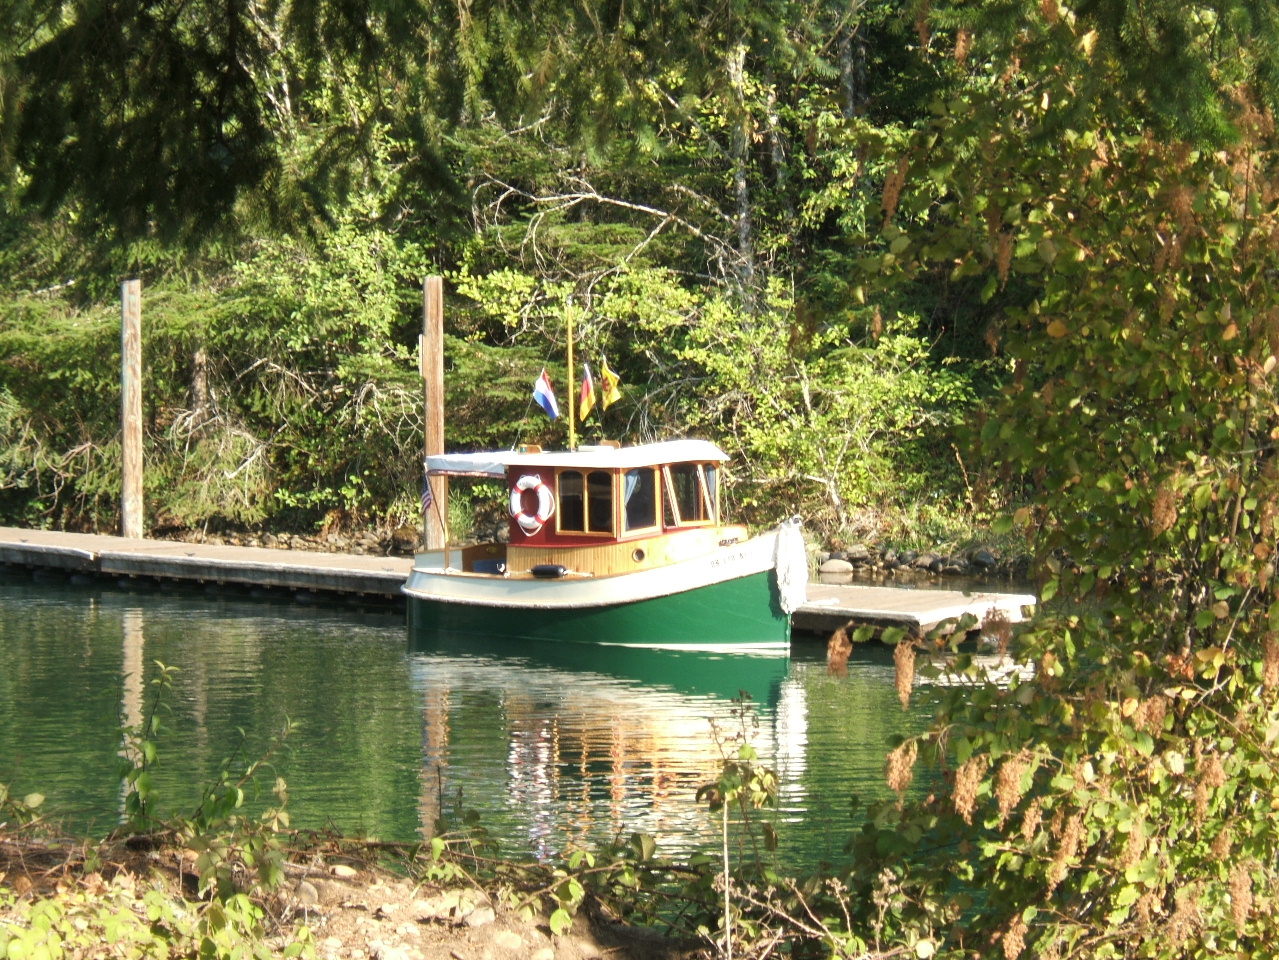
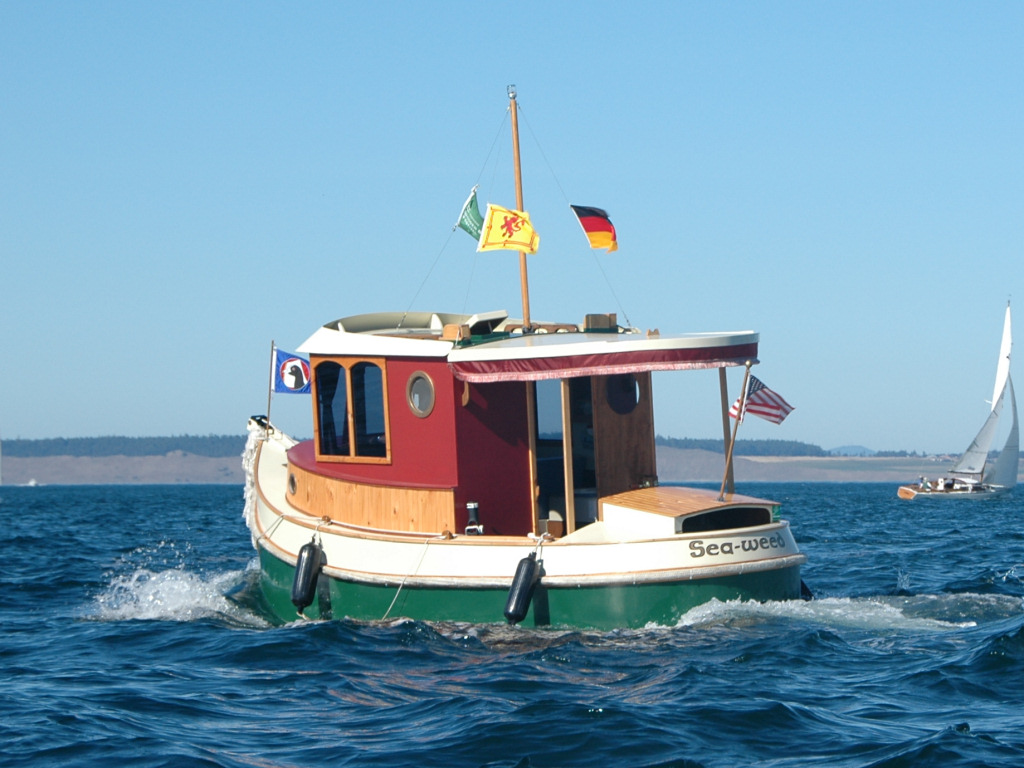
Maybe the bottom of the Joli can be left fairly flat but the sides could taper in to the bow. And maybe the transom could have a tight curve that would hide the outboard motor. Dick Mitsch built a wonderful mini tug using an idea like this. There was a great article in the Mar/Apr 2008 issue of Small Craft Advisor about Dick’s tug Sea-Weed.


Dick designed this boat himself based on, “how she should look”. He sketched it out on a piece of brown wrapping paper and then started building. She looks great in the water and she’s winning the hearts of her admirers. Now I’m not proposing that we can all go out and design our own boat, but in this case it worked out great. It turns out the boat is pretty seaworthy. Dick found this out one day while cruising on the Columbia River. A big 45 foot yacht went by at full speed which left Dick in its three-foot wakes. The tug handled it just fine.

Looks like I better get back to the drawing board. Let’s see what I can come up with for a hull modification on the Joli.

Just a quick note of thanks to the people that have taken such wonderful pictures for us to enjoy on the internet. It really is amazing and we owe them a debt of gratitude. Thanks!

Monday, February 9, 2009

A Floor Plan in Sketchup

I decided to work at this boat idea from a different angle this time. I’m going to start working on a floor plan in Sketchup. This will make it easier to place 3 dimensional items later on. It will also give me a chance to work on the single beds in the back.

It turns out that the dinette in Philip’s original drawing is about 44 inches wide. I checked in our Vintage Camp Trailer, and found out ours is only 36 inches wide. I think this might help in making the rear bunks into singles. Also, If I cut the rear dinette bench at an angle, It makes it even easier. A narrower table also opens up the walkway in the kitchen/dinette area. This will help with traffic flow through the center of the boat.

Larger Video

Unfortunately, if I make single bunks in the rear, I will lose the rear closet. This may be a problem since storage is at a premium in a boat. Who knows?

Larger Video

The video above shows how I can start placing frames using the floor plan in Sketchup.

Stay Tuned!

Saturday, February 7, 2009

A Little More Room and a Twin Bed

It's interesting to me how I have to see something before I figure it out. Maybe that is why this whole virtual build works for me. I can’t imagine how much time and wood I would waste while I tried things that I thought would work.

First example today is my thoughts for two single bunks instead of a twin bed in the rear of the boat. We have a twin bed in the back of our vintage camp trailer. I don’t like the idea that the person on the far side of the bed, the side against the wall, has to climb over the other person to get out of bed. There’s no good way to do this without waking up your partner.

I also felt that four single bunks and a dining table that converts to a bed would be more versatile for guests. Maybe three of my buddies and I want to go on a fishing trip. Who is going to end up sleeping together on a narrow 3 foot 6 inch twin bed? Not a pretty picture ;-)

It wasn’t until I played around with the Joli floor plan sketch that I realized the single beds wouldn’t work. The companionway ends up with a tight, narrow jog. It’s almost like Philip knew what he was doing. Big Grin!

I haven’t given up on the four single beds idea, I just need to work on it some more, but there may not be a good fix.

The next area of concern for me was the exterior cockpit length. It seemed really short, especially the way I have the outboard configured. My last entry gave a little hint of how I want to do the outboard. I’m hoping it will end up with a wooden cover over it to further hide the source of propulsion.

I figure that at a minimum, I want two people to be able to sit comfortably side by side on the cockpit benches, or one person should be able to recline with their back against the cabin wall with legs stretched out on the bench. It turns out that I’m closer to that size than I thought. I measured the love seat in our living room and came up with 4 feet of length. I won’t need to add much to the overall length of the boat at all, certainly within the 10% that many people have discussed as the safe range of modification.

Well, I’m guessing a little on the space that is required for the outboard, but it looks like the boat would be 25.5 feet long. This would end up being 6 inches longer than the 10% increase that people say is a safe margin. Can we live with 6 inches over? We’ll see.

More to come.

Friday, February 6, 2009

A Study in Shape

I’ve been having fun putting some shape to my ideas. It’s exciting to start to see some of the things I’ve been dreaming about.

The videos speak for themselves really. I won’t have much to say for this entry.

I haven’t worked in any detail yet, but I wanted to have some general shapes to start working with.

Larger Video

I’ve had some concern about the exterior space available on the Joli. The front and rear cockpits are only about 3 feet long. This seems somewhat crowded and I believe it needs to be revisited. I’m just not sure where to gain space. I like the dimensions available inside so I don’t think I can gain much there, and yet I’m not sure that I want the boat to be longer than about 23 feet. This will need some more thought.

Larger Video

I’m going to continue sketching out some general ideas to start seeing how things fit together overall. I’ll be able to come back to these drawings when I start building my virtual frames.

See you soon.

Wednesday, February 4, 2009

A Joli Sketch

It’s time to step back and start sketching a few Joli ideas with dimensions. I need to have something I can refer back to as I start building my virtual frames.

This is also the chance for me to share some of the design ideas I’ve been thinking about for my Joli build.

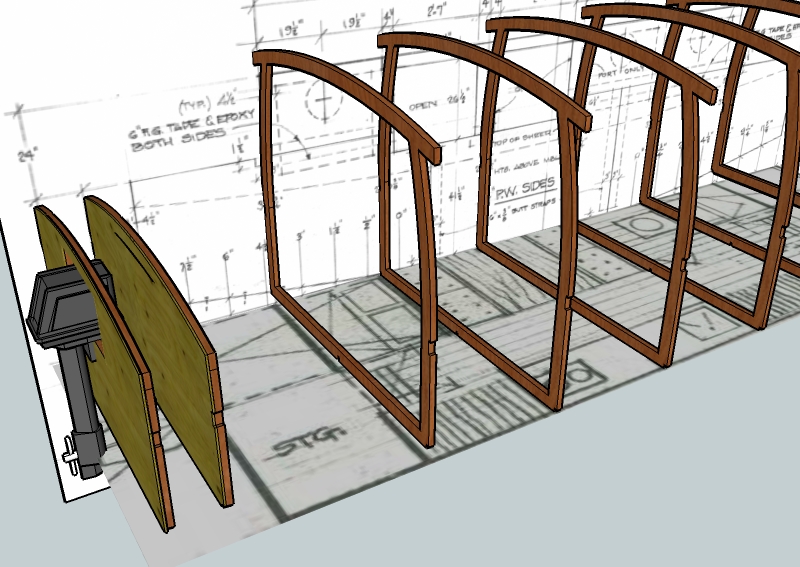
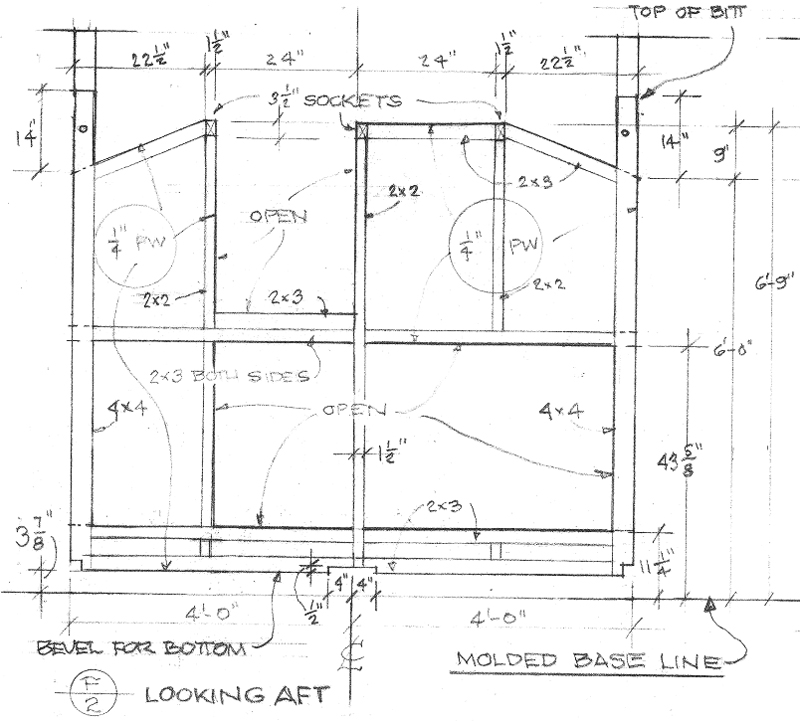
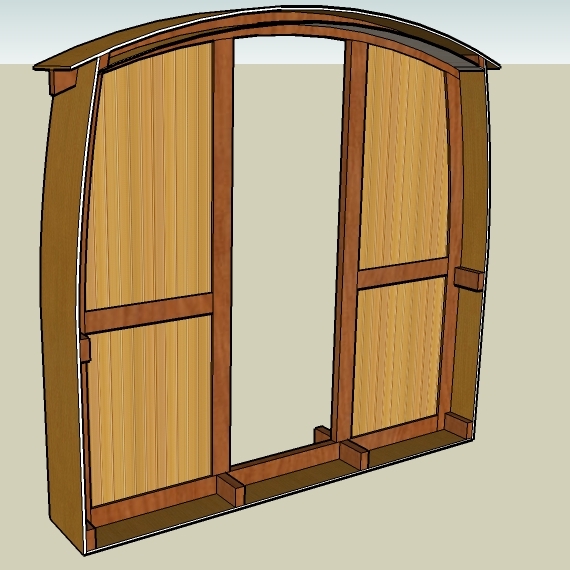
Here’s a frame drawing from Philip’s Joli plans. You can see that he has simplified the roof structure by eliminating the curved top. This is frame number 2, or the back wall of the cabin looking out towards the back of the boat. You can also see that the Joli has the companionway hatch offset to the right. This allows room for a double bed in the left rear of the boat.


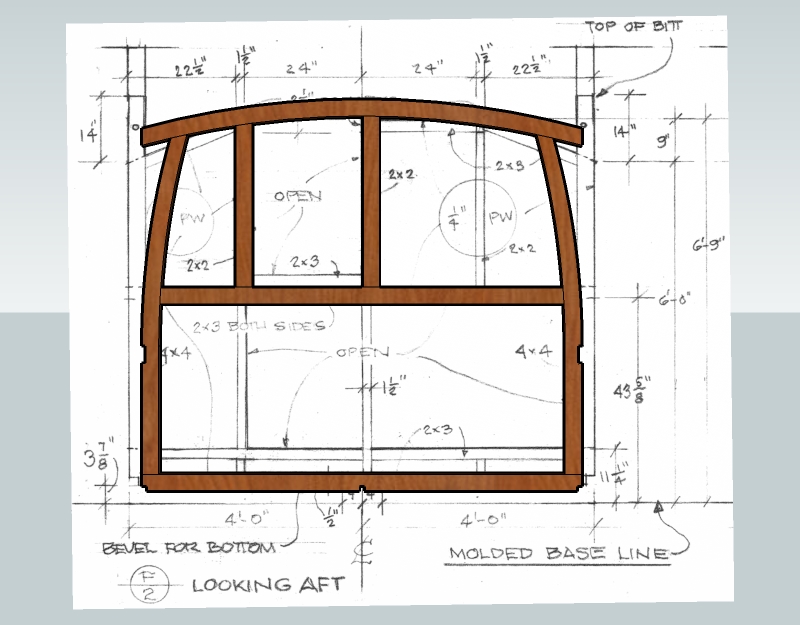
I really want that curved roof. Any Escargot pictures I’ve seen look really good with the curve, so I’m adding it back in. I’m not sure about the double bunk in the rear. I may prefer single bunks on each side of the hatch like they are in the front of the Joli. I’ll be able to try both configurations in my virtual build.

So let’s talk about some general dimensions. I’m using an 8 foot square jig and assembly table. This table has a 2x4 frame around the outside bottom edge of the melamine. I’m using alignment pins to help define the frame locations. The way I have this drawn is a 2x4 vertical pin attached to the inside of the 2x4 frame around the edge of the table. This initial pin holds tight against the outside of the Joli frames; so, the widest my Joli could be is 7 feet, 6 inches. (8 foot table minus 1.5 inches on each side for the 2x4 frame, minus 1.5 inches on each side for the alignment pins.)

I want the sides of the cabin to curve in towards the top, so I’ve drawn this as 6 inches narrower at the top of the side walls.


I intend to have standing headroom in the inside of the center of my Joli. My son is tall, so in our family, this means 6 feet four inches between the top of the floor boards and the bottom of the ceiling beams. My frames will be 2x4 boards on edge plus 2x4 boards lying flat for the floor boards; so the highest point of the frame on the inside will be 6 feet 4 inches plus 7 inches for frames and 1.5 inches for floor boards for a total outside height of 7 feet ½ inch.

The length of the boat seems just fine as designed. 8 frames spaced evenly apart, 3 feet 3 inches on center for a total boat length of 22 feet nine inches.

Here’s my idea of how frame number 2 might look. You can see that I’m a little narrower than the original plans and slightly taller.

My logic for boat dimensions may not be correct, but it’s a starting point. I’m going to continue with these sketches to confirm some ideas before I start building some frames. Even if they are just virtual ;-)

Saturday, January 24, 2009

The Garage, More Than A Boat Shop

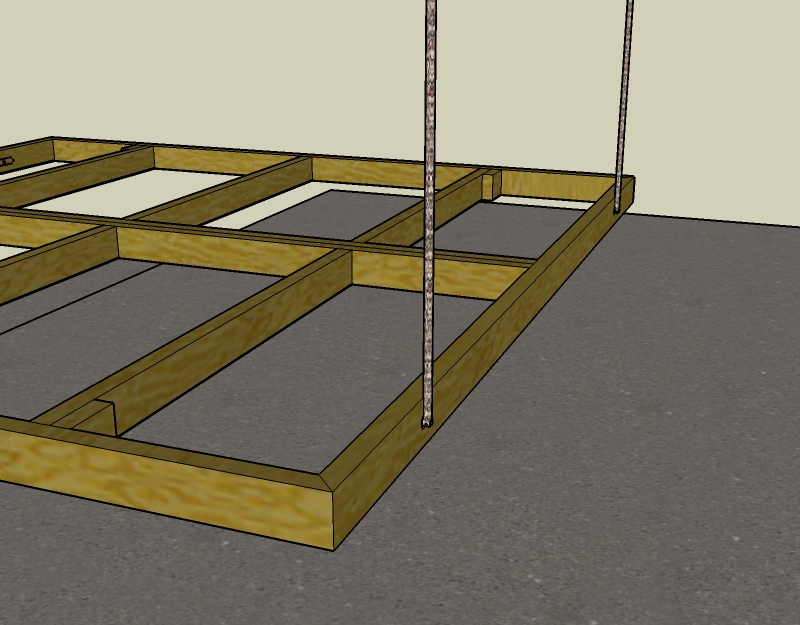
Well, I’ve done some modifying to the assembly table. As you can see, the garage is going to be crowded with this table in place. I needed to figure out what I could do with it when it wasn’t being used.

Larger Video

I rotated the table around 180 degrees and moved it closer to the garage doors. I also decided that the best place for the table when not in use would be hanging from the rafters but since I’ve built my table taller than the original design, the legs would be hanging down and creating some real skull crunchers! I needed to make the legs fairly easy to remove. The video below shows the solution that I came up with. Folding legs seemed too complex so I went for some leg pockets.

Larger Video

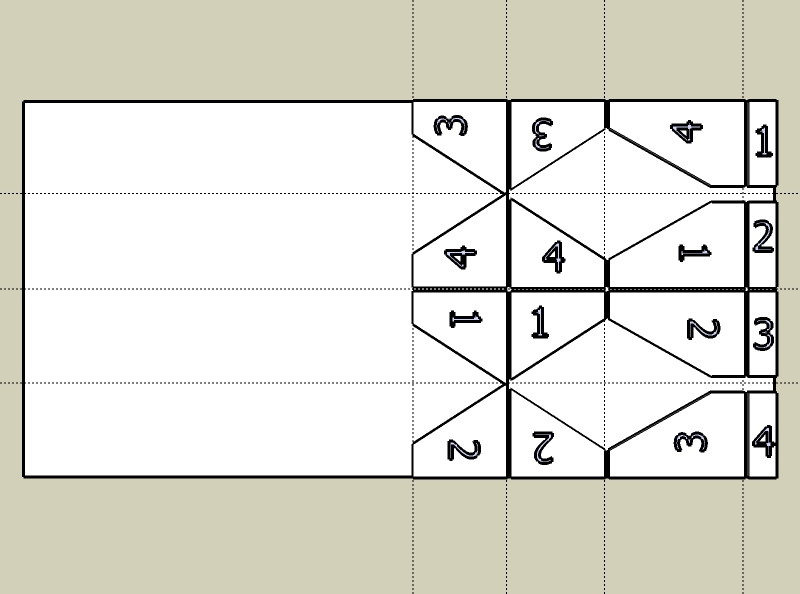
I realized that Sketchup allowed me to play with cuts and assemblies to make a part stronger as well as helping with more efficient use of material. You can see from the picture below that I can get all of the parts I need for the leg pockets out of a 4x4 sheet of ¾" melamine. I laid out the pieces so I could make long cuts with a Skilsaw and then finish cut to size on the table saw.


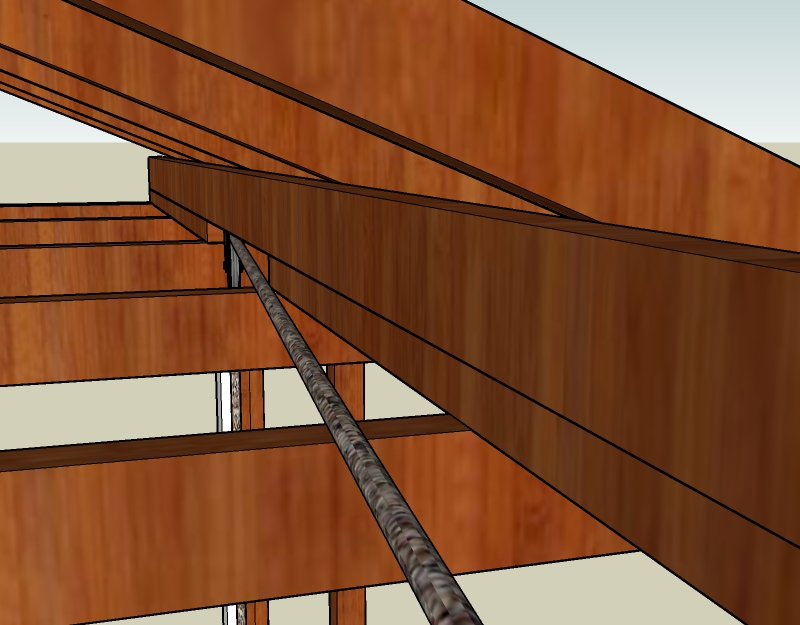
I reinforced the roof trusses in the garage to handle the weight of the table. Trusses are not designed to have things hanging from them. They are engineered to support the weight of the roof pressing down as well as keeping the walls from pushing out. I built supports that transferred the weight of the table across many trusses and also connected this to the upper webs of the truss. I also built a pulley system that made it easier to raise and lower the table.

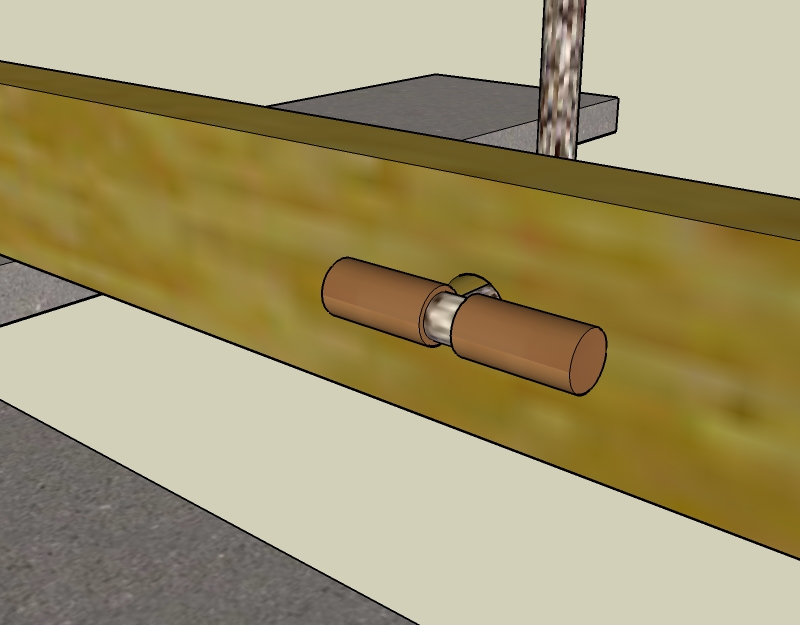
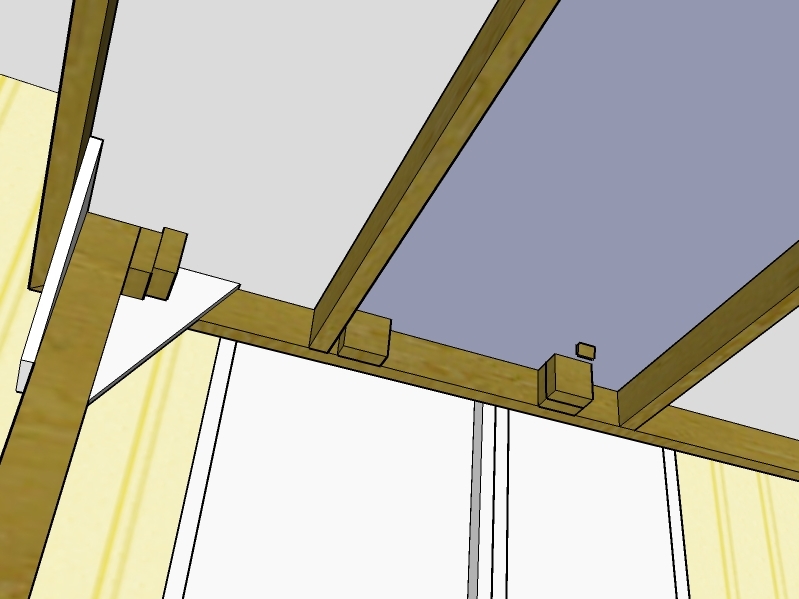
I didn’t want too many things sticking out from the side of the table so I drilled four holes in the outside frame. I used some 1/4” line that is tied to a round dowel with a groove in the center. Just push the dowel through the hole and then turn it crosswise. It can’t slip back through. I had a little trouble drawing the line and the dowel, but I think you get the idea.

Well, here’s where a little trouble developed. I made some of the same mistakes in my virtual world as I do in my real world. This might be a turning point for how I write these blogs. Up to this point, I’ve completed a blog entry much like a chapter in a book would be. I spend a week or two working through drawings, ideas, photos, and wording and then I present it in its finished form. I think I’m going to start sharing the process in more detail. The blogs won’t be completed “chapters”, but rather little snippets of the struggles, mistakes, and solutions that I’ve come up with during this process.

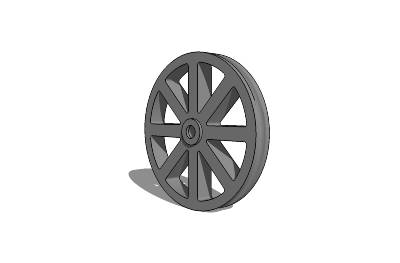
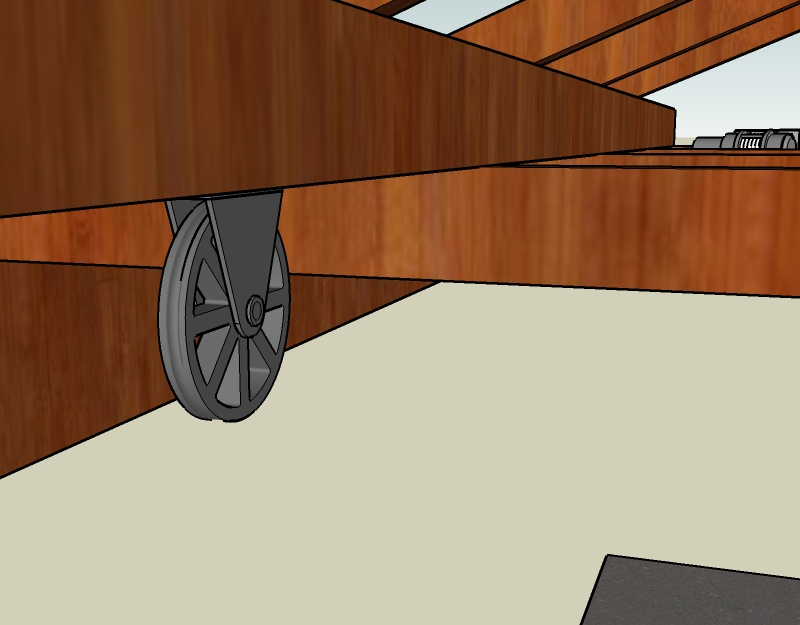
The first thing I did was to lay a 2x4 on edge across the top of my garage trusses. Then I went on my virtual shopping trip to find some pulleys that might work for the table. For Sketchup, that means a trip to the Sketchup 3D Warehouse. This is a wonderful place to go “shopping” for ideas and models for Sketchup. I found a pulley that would work with some slight modification.


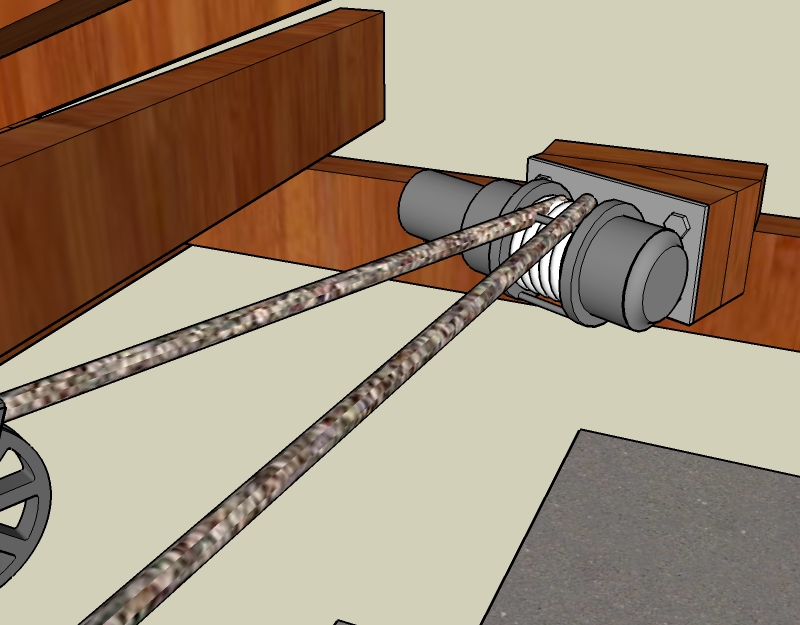
It wasn’t until I started threading my rope through the pulleys that I realized that my initial plan wouldn’t work. How would I route the rope to a winch?

As you can see, there’s no way to get the rope above the trusses. I added a 2x4 laying flat under the vertical one but that still didn’t totally solve the problem. I had to angle the pulley so the rope would clear the 2x4 spacer.

This solved some problems but created new ones. Now look at the goofy angles that the rope hits the winch. I had to put in some big spacer blocks behind the winch to get it to line up better but I bet the difference in angles between the front and rear ropes will be too much.


Now it’s back to the drawing board.

More later ;-)

Saturday, January 10, 2009

The Table is Finished (or is it?)

Larger Video

As you can see in the video above, the table is complete and it’s sitting in the garage. I’ve actually got a frame started on the table, but I’m getting a little ahead of myself. It’s in place to help demonstrate how I intend to use the table. 

In my mind, the key to a straight Joli boat is consistent frames and then a straight, flat surface to assemble on. Let’s get started with building a table to help assure consistent frames. 

This table may be over-built and in fact should probably be used for more than one Joli boat, (maybe that is something we can talk about in the future). The frame work for the table will be 2 x 4 material. Maybe I can find framing lumber that is straight and true enough or maybe there is some manufactured material that will be better for this. 

The top could be ¾” melamine, or something new I ran across in the May/June 2008 issue of Fine Woodworking called Phenolic Plywood. This is Baltic Birch plywood with a thin coating of phenolic resin. It has superior strength and flatness compared to other plywoods. 

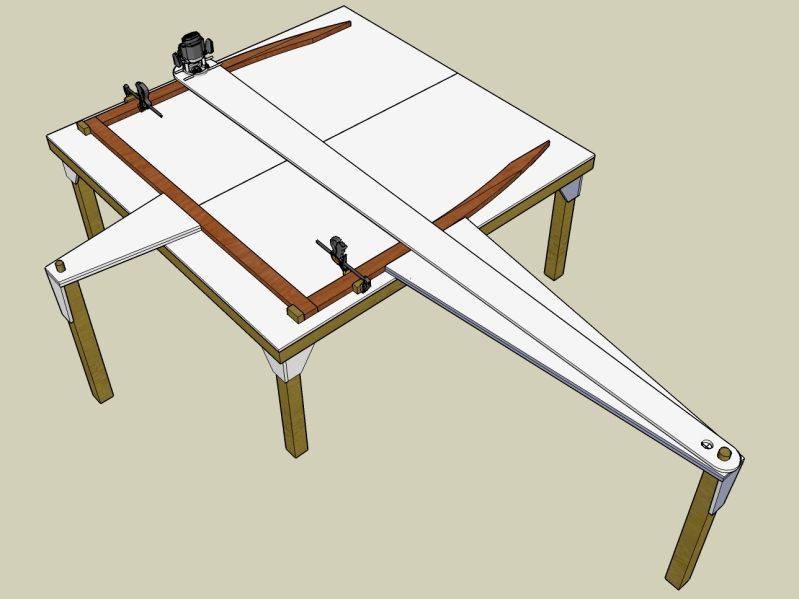
You can see in the pictures below that my Joli table has 2 x 4 alignment pins at key locations. It turns out that the size of the frames are actually determined by the table size. The top surface will be 8’ square. 


There is a 2 x 4 frame running under the edge of the table and the pin attaches to that frame. So, the widest portion of the Joli frame ends up being 8’ minus the 1 ½” from each side for a total width of 93”.

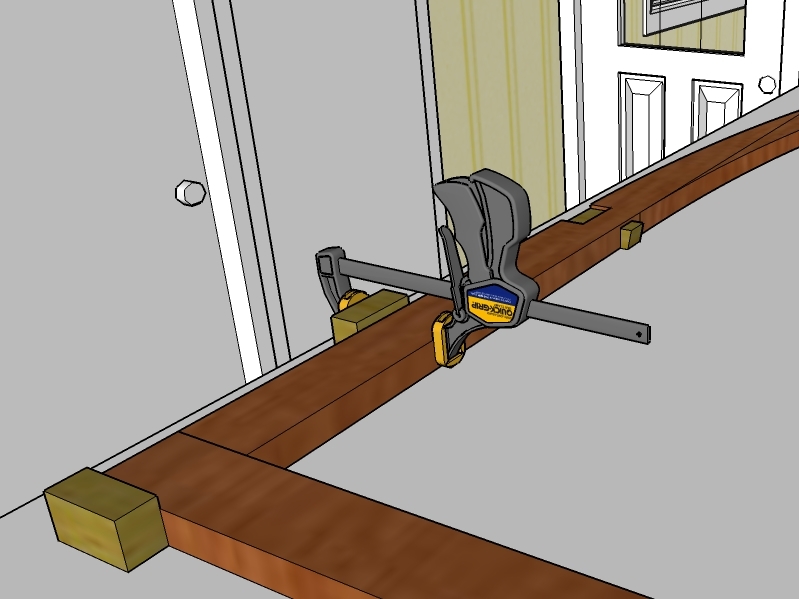
I tried to find a location on the frames that runs the full length of the boat that would represent the zero line. Each frame has a set distance above this and below this line. If I cut the notch in the frame first and then set it into the jig, I can then use the jig to cut my lengths. I would use this notch later during boat assembly.

The jig table is also used to cut the curved roof beams. This will be done with a router attached to a long arm that pivots on the far end. In my case, I also talked about having curved cabin sides. I would also do this with a router and long arm. Again, I think this assures greater accuracy when cutting out the parts of the frame. The pivoting arms would have multiple holes on the pivot end for cutting the outside or the inside of the curve.


I’m re-thinking my table design a little now that I’ve got one built. Oh the joy of a virtual build ;-) Now is the time to figure some of this out. I built the table 40” tall. This seemed like a nice workbench height but it will make it tough to reach toward the center of the table. What if the middle of the table was cut out? They use this technique on model railroads to allow access to things that are too far from the outside edge.

So either the next entry will involve making some Joli frames or rebuilding my jig table. We’ll see.

On a technical note, I’m still working on a way for the reader to view the videos in a higher resolution and larger size. I've added a link below the videos that points to my Flickr site. It's not the perfect solution, but better than the embedded videos. I think this will make it easier to view some of the detail that I’m trying to show. It seems to work well for any of the pictures on the blog. I’ve also added an e-mail link to the site. It is a hotmail address in case there are some issues with spam, but if you write to me using that link, I’ll write back to you from my gmail account. I’d love to hear from you.

Thursday, January 1, 2009

Do I have Somewhere to Build a Boat?

Here I am with a small 50’ x 100’ lot in town. Our house is 950 sq ft. It doesn’t take much math to figure out that I don’t have much room left for building a boat.

I fired up Sketchup on the computer to see what I could do with the room I have. There are a couple of things you should understand about Sketchup. Here’s an excerpt from Google Sketchup for Dummies. Sketchup is a “surface” modeling tool. That means that everything is made up of thin (infinitely thin, actually) surfaces. These are called faces. Even things that look thick (like cinder-block walls) are actually hollow shells. Making models in Sketchup is a lot like building things out of paper – really, really thin paper.

Here’s a portion of our house built with Sketchup. I drew in the details to demonstrate the possibilities as well as challenge my skill level. I also created scenes to build an animation. I think this will be an easier way to communicate my ideas rather than using static images.


I have room in the back yard for building a shed. It has access from the parking lot behind our house as well as from the side street. The downside is that the driveways are pretty steep. It may be hard to get a boat in and out. Here’s what a shed would look like. I’ve also included additional “features” that would make this project more appealing to my wife, a very important consideration ;-)


Larger Video

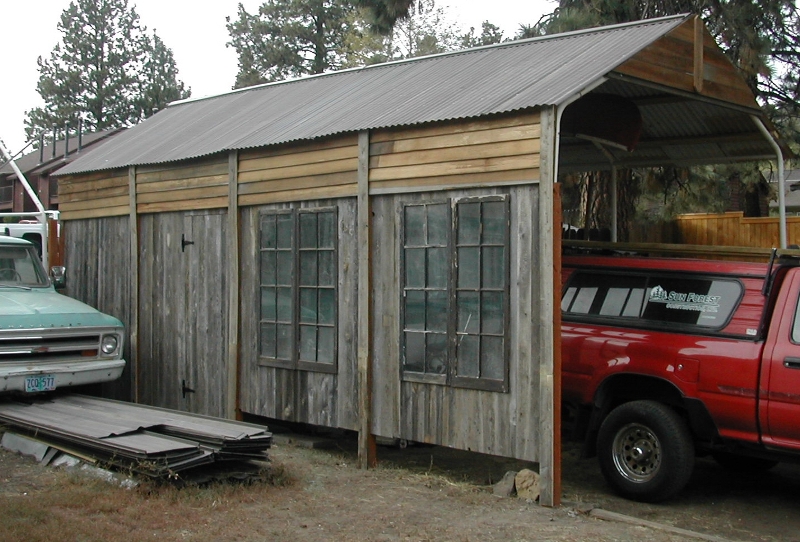
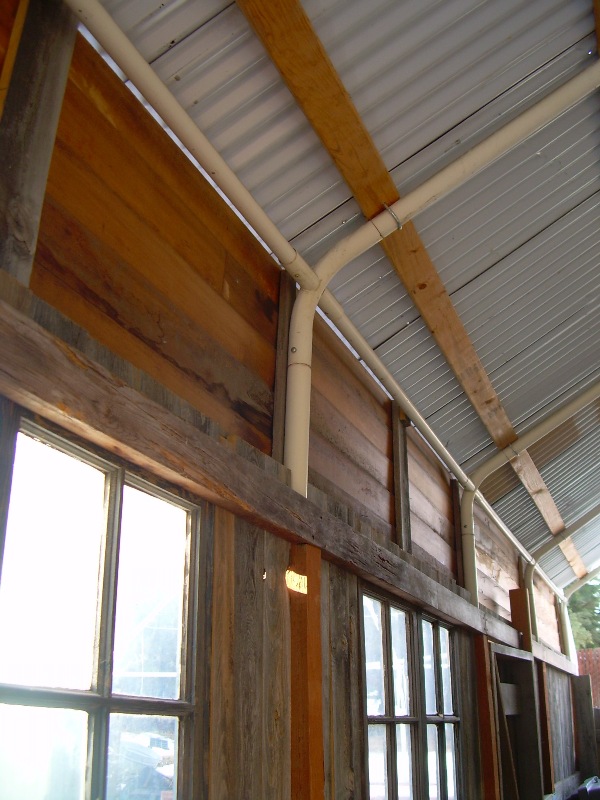
Well, I fudged a little; I’ve already built the shed. I started with the portable sheds you can get from Costco. I used the angled roof trusses on top of 10’ 4x4 posts buried in concrete. I had enough pieces to build a shed that is 10’ x 24’. I helped a friend tear down his old shed and salvaged the roofing and siding for my shed. Right now our Vintage Oasis Camp Trailer is stored in there, so I’d need to find a new place for the trailer if I wanted to build a boat in the shed.


When we built our house, we added a carport out front. I think it would be fairly easy to enclose this carport with walls. Unfortunately the covered area is only 18’ long. Not enough to assemble a 23’ Joli boat. The carport does have a 6’ x 12’ storage area at the front so maybe I could tear out the doors and wall that separates this from the carport. The problem is that we’re using that area for a freezer and other storage. I don’t think we could give it up.

The carport is 12’ wide so I think that would work for a boat that is 8’ wide. Not a lot of extra room, but doable. I could increase the width by 2’ by building out to the outside end of the overhang. This would be a great place for tools and a workbench.

Here’s what that might look like.


Larger Video

 Ok, I fudged a little again; I’ve already started enclosing the carport. I still need to pour an additional 2’ of slab on the side so I can build the wall on the left side of the garage. That will be a project for this coming summer after the ground thaws.

I suspect that I will end up building the frame assembly table and frames in the garage and then move out to the boat/trailer shed to assemble the frames into a boat. Building frames would be a great winter project because I could insulate the garage and keep it warm. Assembling the frames into a boat would be a better summer project because the shed is fairly open.

Next step is to build my virtual assembly table in my virtual garage.

Thursday, December 25, 2008

Where am I Headed?

This seems like a good time to talk a little bit about my thoughts on my Joli boat build.

I know I’m treading on thin ice here as I’m thinking about changing an existing design and making “improvements”.

Yea right, what do I know about boat design? I guess that is another reason to build my Joli boat virtually first. Of course I won’t know the impact of these changes until I have a real boat in the water but at least I can explore some ideas and resolve some issues that come up before I’ve invested a bunch of time, effort, wood, and epoxy.

I’m looking forward to doing some more designing using the free Google Sketchup. This program will have some limitations when it comes to drawing boats, and in fact there are better hull design programs available, but I’m going to stick with Sketchup for now.


If you’re interested in boat design, you may want to check out DELFTship. Bruce Hallman of the Bolger Yahoo group is using this software to draw amazing isometrics of many of the Bolger designs. You can see his work over on Flickr. There is a free version of this software available.

The first thing that I want to try to modify is the cabin shape of the Joli. I’m wondering if curving the sides of the cabin in towards the top would give it a little more nautical shape or look. This would also give the roof a slight overhang that I think might look good. I realize that this will create some problems with building the boat upside down using Philip’s method of leaving the frames long to act as temporary supports. I’ll have to work on a solution for this.


I’m also thinking about building the frames more like a traditional raised panel wood door. I think I could use clear cedar deck material as the frames along with paneled inserts made out of pine bead-board. I think this would give a nice contrasting color below decks as well as a warm cabin feeling.


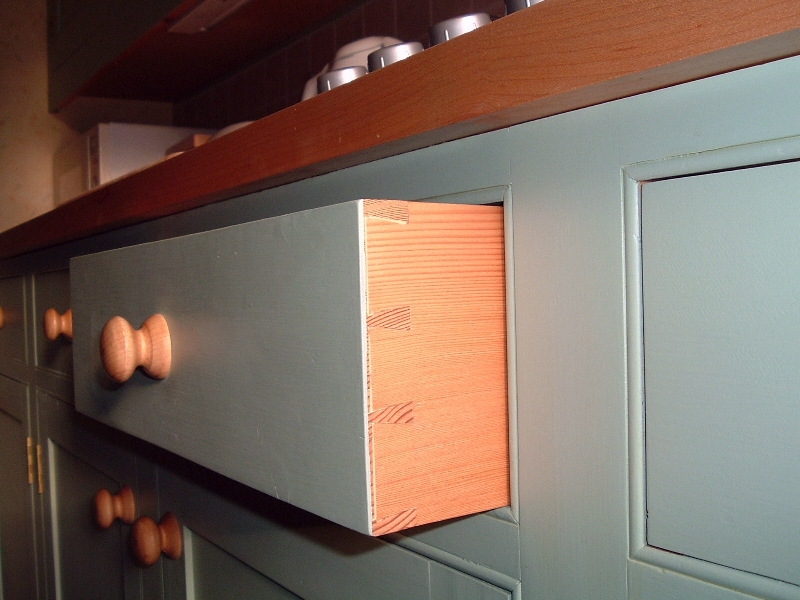
I’ve also collected photos from the web about different ways to finish the interior. I really like the look of flush fitting doors & drawers finished in a oil-based enamel paint. I don't think knobs are a good idea and I think there has to be some way to keep the doors and drawers closed while under way. I think I would finish the ceiling with the same pine bead-board as the frames, but I would paint this with a white oil-based enamel to keep it light down in the cabin.


I would like to use clear cedar deck boards on the floor of the cabin using the frames as the support much like a deck would be built in your back yard.


Well there really is so much more to dream and plan about but I better start thinking about where I might build a boat like this. I’ve got a carport out front that might work, and I’ve got some room in the backyard that might work. Our lot is 50’ x 100’ so this will take some creativity.

Stay tuned!