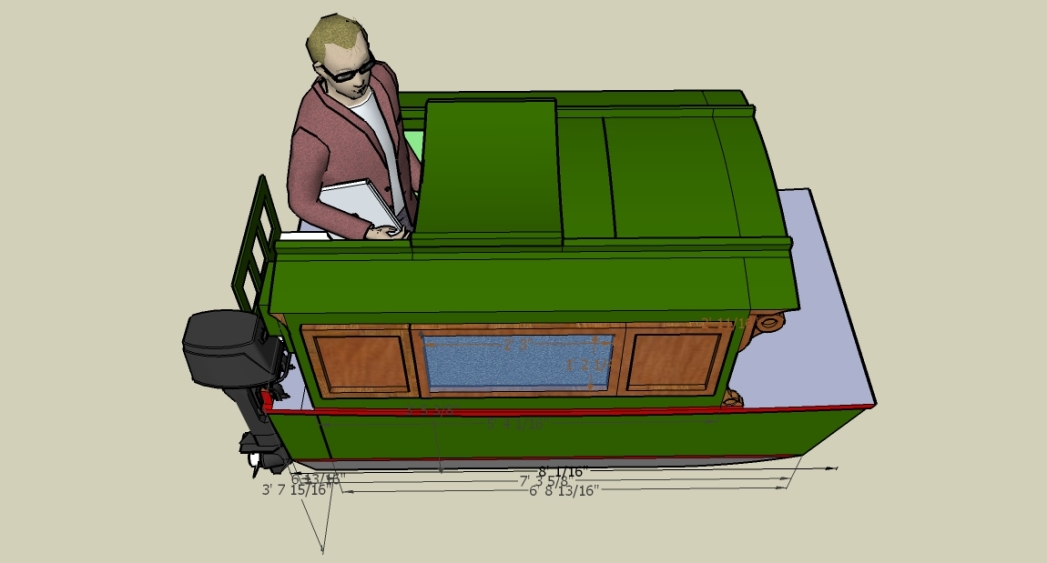
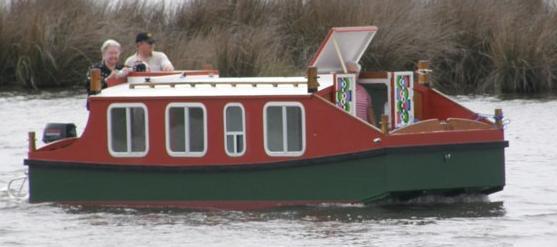
TUESDAY, DECEMBER 16, 2008

OK, before you get all over me about being in the "real" world, just give me a minute to explain ;-)

I bought a set of plans for the Joli boat from Philip Thiel. Unfortunately, this is not the right "season" in my life to really start building a boat. So, should I just wait and dream, or should I make some kind of forward progress?

My intent here is to keep a journal of my progress. I'll be using Google Sketchup to build my virtual boat. I'm sure that along the way I'll run across problems that need solving, trouble keeping on task, and moments of inspiration.

I'll include pictures and video as I progress. Click on any picture if you'd like to see it larger.

Maybe I'm crazy, but follow along and see what you think

Saturday, April 4, 2009

There’s Someone Who’s Actually Building A Boat

Ok, I know there are many people out there who are actually building boats and not just talking about it but I’m particularly interested in one at the moment.

You’ve heard me mention Bryan Lowe before. He built an Escargot several years ago and he shared that experience with us on the web. His story has been a real inspiration to me.

Well, he’s at it again. I’m so excited to follow along as he builds a Micro Shanty. He plans to have this boat finished for the Center for Wooden Boats Home Built Boats Weekend in Seattle on July 25 and 26. I’m really hoping to join him on that weekend for the show. He’s also promised me a trip on the Snohomish in Shambala, his Escargot. I can’t wait!

So, what does a Micro Shanty look like? What’s his inspiration? Where can I go to find out more? I thought you’d never ask ;-)

This looks like a fun project and I’m looking forward to seeing how Bryan handles this one.

I’ve started on a floor plan, (AGAIN!), for my Joli. I wrote about my logic on interior dimensions here. Fortunately that work has not been in vain because the same things apply to the rectangular shape that Philip Thiel originally designed.

It was very exciting to hear from Joshua Colvin this past week. He is the editor of Small Craft Advisor magazine. He asked me to write an article about Shanty Boats. This has been a real honor to be asked to write something, but I felt like Bryan has a longer history on this subject so I passed Bryan’s name on to Josh. It will be interesting to see if Bryan will have something published in this magazine.

Friday, March 27, 2009

What Was I Thinking!

I’m pretty sure that more than just a few of you have been wondering about my hull shape for the Joli. Sure it would have a nice shape but things really got more complex than Philip Thiel ever intended. I think I’ve achieved enlightenment. It’s time to simplify again.

I know you’ve heard it here before but once again, “Boy I’m glad I haven’t cut any wood yet!” Just think about the money and time I’ve saved with this virtual build. At the current rate of money and time saved, I should be able to build a 50’ boat pretty soon ;-)

I’m still interested in curving the cabin sides in on the top and I think I’ll pursue the angled front and rear bulkheads for the cabin so access through the hatches is easier. It also seems like the front deck would be more useful if it were more like the rear cockpit with a floor and seat area. We’ll see.

It looks like spring is in the air in some places. Here in Central Oregon, we’re seeing some sun and warmer temperatures, (highs in the 40’s and 50’s), practically swimming weather. Time to get the O’Day Widgeon out and cleaned up. At the very least, I need to build a rudder for this boat. We lost it during a capsize a few summers ago.

I’m also excited to get the canoes out again but I’m really kidding myself. We won’t have access to the majority of the lakes until some time after June 1st. Oh well.

Rumor has it that John Cockerham has got his Escargot, Gumbo in the water. See his post below. How exciting!

Gumbo finally got underway for the first time. I wasn't really ready yet, since the interior still needs some finish work and the wiring is not in. My mother (80) flew out and did all of the sewing on the cushions and curtains. She wanted to go for a ride in it and I couldn't refuse, so I had to sneak it down to a quiet ramp for an unofficial launch. The official launch will be when the boat is legal. I have been waiting for about two months for the Marine Patrol to inspect the hull to verify it is home built and assign a hull number so I can register it and be legal. An agent was supposed to come today, but since it's already after 5:00 I doubt he will make it. I love dealing with bureaucracy. The Nissan 6 HP with 25" shaft seems perfect, but since the motor is still in the break-in phase I didn't use over half-throttle.

John, Grand Bay, Alabama
Escargot #7 as close as I can tell.

I’m looking forward to seeing more pictures of John’s boat in the water. Congratulations John, it looks like you’ve done an awesome job!

In closing, here’s a great video from Bryan Lowe featuring some trips on the Snohomish River in his Escargot. What an inspiration. Thanks Bryan, I needed that ;-)


Tuesday, March 17, 2009

Standard Minimums and a New Footprint

I decided to take another shot at a floor plan for my Joli based on some minimum standards that I’d like to have along with some features that I would really like to include.

Starting at the transom, I want to have an outboard hanging on a standard transom, but I want it covered behind and above the motor as well as separated from the cockpit. It looks like this length should be about 29.5 inches. This sets the positions for frames number 1 and 2.

I’d like a larger cockpit than the original Joli design, but I’m drawing it at 4 feet for now. The back wall of the cabin will be angled, or tipped forward on the top. I think this will look nice as well as making it easier to enter the cabin from the cockpit. This sets the position for frame number 3.

I decided to set the bunk lengths at 74 inches. A standard queen bed is 78 inches long and a standard twin bed is 74 inches long so I think this will work for my family. This sets the position for frame number 4.

Next comes the dinette and galley area. The dinette makes into a double bed, so we know the total length between frames 4 and 6 has to be 74 inches. Frame 5 should be exactly centered between 4 and 6. So now we’ve set the position of frames 4,5, and 6.

After the galley comes the closet and head. I thought I’d be generous here and have a head that is 4 feet long. Talk about luxury ;-) This sets the position for frame number 7.

Now we’re up to the forward bunks. They need to be 74 inches, so this sets the position for frame number 9. Since I’m drawing my Joli with a more conventional bow, Frame number 9 isn’t clear at the front.

Frame number 8 is the front of the cabin. This frame will also be angled, or tipped in at the top. Not only does this make it easier to enter the cabin from the forward cockpit, but it also makes a nice backrest if you’re reclining on the front seats of the forward cockpit.

I would also like a lower floor area in the center of the forward cockpit. This makes it more useful for a sitting area and makes it easier to step down into the cabin. I ended up with a forward cockpit that is roughly 57 inches long. The sets the position for frame number 8.

Larger Video

We also need to talk about some standard minimum widths. A standard queen bed is 60 inches wide. I’m sorry, but I don’t think we can be that generous in our boats. I’ve set the width of the double bunk in the rear at 48 inches. I hope we can live with this.

I’ve set the minimum companionway and hatch width at 24 inches. Narrow but functional. If the dinette makes into a double bed, it should also be 48 inches wide. If you add 24 inches for the companionway and subtract the width of the frames, you end up with a galley counter that is 17 inches deep. Our vintage camp trailer has a kitchen counter that is 22 inches deep, but I guess an 8 foot wide boat only leaves me with a 17 inch counter. Oh well.

Now if we use the same logic for the forward bunks, 24 inch companionway in the middle and 2 frames at 3.5 inches, we end up with single bunks that are 32.5 inches wide. A standard single bed is 38 inches wide, so things are just somewhat tighter on a boat. So goes it.

Well, now that I’ve set some standards and defined my frame locations, I can start placing some bunks, seats, toilet, motors, and all the other stuff that needs to fit in my boat.

Oh yea, if you’re wondering, my Joli ended up at 27 feet long.

Saturday, March 14, 2009

Links of Thought

As I promised last time, I intend to spend a little time sharing some internet links that I’ve found; interesting, useful and sometimes, “just plain entertaining”.

But first I want to talk about my new boat design. The shape is a little odd but I think I can make it work. It’s 24’ long by 12.5’ wide. It’s about 14’ tall at the peak and the hull is made from 8” thick concrete. Doesn’t sound like a winner does it ;-)

Actually, I’ve just described my garage/boat shop. Problem is, it may need to become an apartment. You see, our oldest daughter has come back to the roost, and she has 4 children with her. Not exactly what any of us dreamed about but none the less, so it is.

Our home is only 950 sq ft and it’s feeling a little crowded with 9 people. Sure, some of those people are still pretty small but we’re running out of room.

I had the guys at work do a little drawing for me to see how we could make the garage functional as a living space. I’m not totally satisfied with their initial thoughts and I think we’ll need to think outside the box here a little.

The garage/apartment is in the lower left of the image above. You may recognize it from some of my original shop drawings on this web site.

If you think of the garage as a boat, it seems fairly roomy. I’ve been playing around with a few different ideas. We’re not sure what is happening next and for now we’re taking it a day at a time. I’ll let you know if I go further with this apartment design.

So, let’s talk about web sites. The time on the web has really been great for me during these recent times of feeling like the boat building dream is fading away.

First on the list has to be one of my personal favorites because it has been such an inspiration to me. Bryan Lowe shared his journal on-line of his experience while building an Escargot boat designed by Philip Thiel. This is a must read for anyone contemplating a boat build. Good Stuff!


Bryan has continued in the shanty boat world with a new site. Here he shares all things shanty. Keep an eye on this one!


Bryan is also the moderator for the shanty boat yahoo group. This is a great place to exchange ideas with like minded individuals.


Another great place to follow along as someone builds an Escargot is John Cockerham’s web site. It’s so awesome to see his detailed pictures and his notes about progress. He’s very close to launch day!


How about, “Build a boat, have an adventure!” It’s pretty hard to beat this down to earth, full of info web site. I’m talking of course about DuckWorks Magazine.


Want to follow along as someone makes the move toward being a full time live aboard? Greg deals with many of the day to day practical aspects of making it possible on a 24’ sailboat.


Let’s talk shanty boats here. Paul Browne designed a wonderful little trailerable shanty boat called the Lisa B. Good. Paul has since passed away but there appears to be a new interest in this simple boat. There’s not much left on Paul’s original web site but I’ve also included a link to the full set of text and drawings, compliments of DuckWorks.

Lisa B. Good Plans

The list of shanty boat sites wouldn’t be complete without mentioning Sam Devlin’s Millie Hill. Sam designs some really beautiful, traditional boats using the stitch and glue method. He’s a great guy to talk to, and his book on boat building is awesome also. The Millie Hill has been slightly redesigned and improved. Here’s a site well worth looking into.


I’m sure you understand that this list is far from complete. We’re so lucky to have so much information at our finger tips. This is just a list to get you started and to keep you dreaming!

I’ve started over on my Joli floor plan. There were several things that ended up too tight or not really workable. Stay tuned!

Friday, February 27, 2009

Goin’ 3D and a Twin Bed

I’ve been working on my flat 2D plan in Sketchup and have started moving into that 3rd dimension. It has been fun to see my Joli start to take shape.

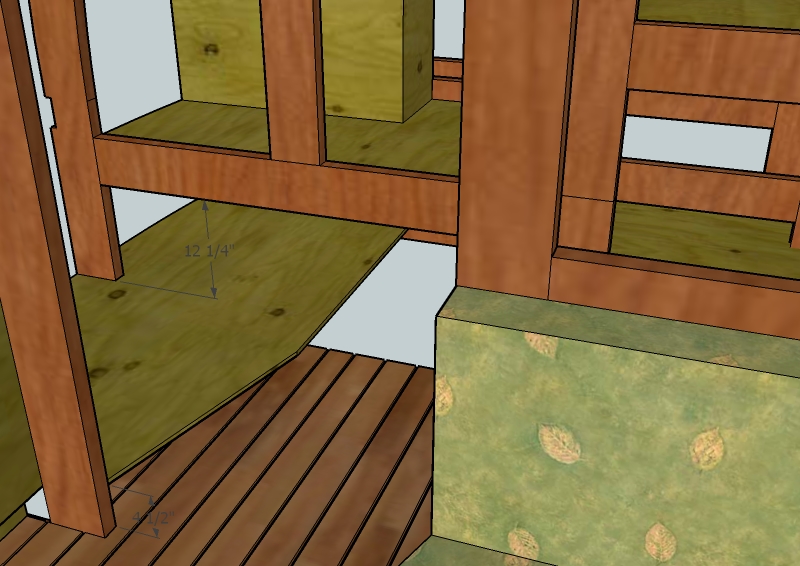
This process confirmed my suspicion that there is no good way to put single bunks in the rear of the boat. There would only be 12 1/4” of clearance from the top of the bed to the bottom of the frame, and this is with a bunk that is only 4 1/2” above the floor. If I add a cushion to the bunk, it gets tighter yet. Clearly this is not going to work.

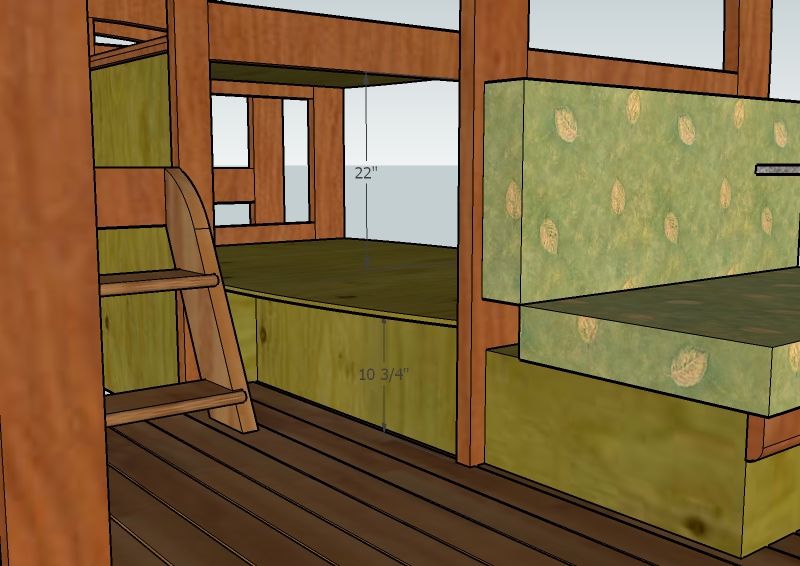
If I go back to Phillip’s original design for the rear bunk, I can have 22” of space. This should allow plenty of vertical room even with a nice cushion on the bed.

As an added benefit, the twin bed could be 10 3/4” above the floor. This will probably be more comfortable to get in or out of. The twin bed also allows a dinette that can be full width rather than cut at an angle to help with traffic flow.

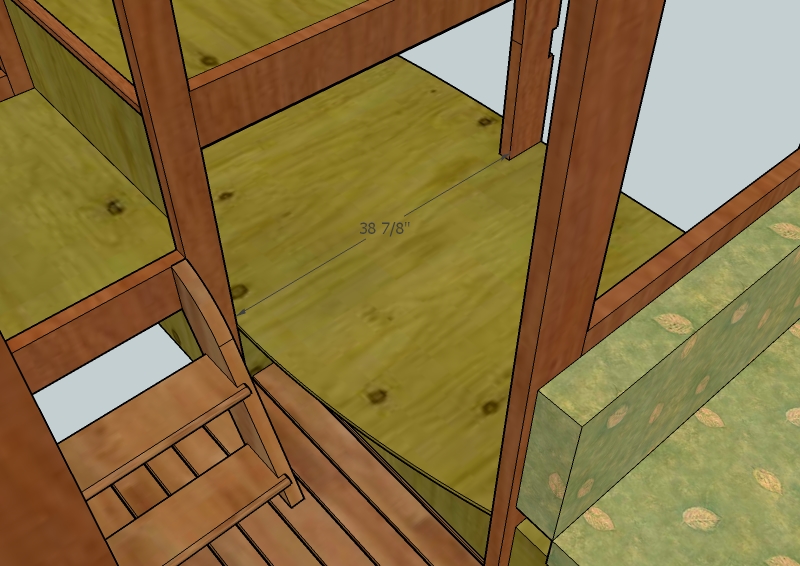
I am concerned about the width of the twin bed. Since my Joli is 6” narrower than the original and mine tapers to a tight radius towards the rear, there isn’t much width available.

We have a vintage camp trailer that I took some key dimensions from. Our twin bed in the trailer is 48” wide. It’s only 38 7/8” in the boat. I don’t think there is any good way to increase this without compromising the hatchway width.

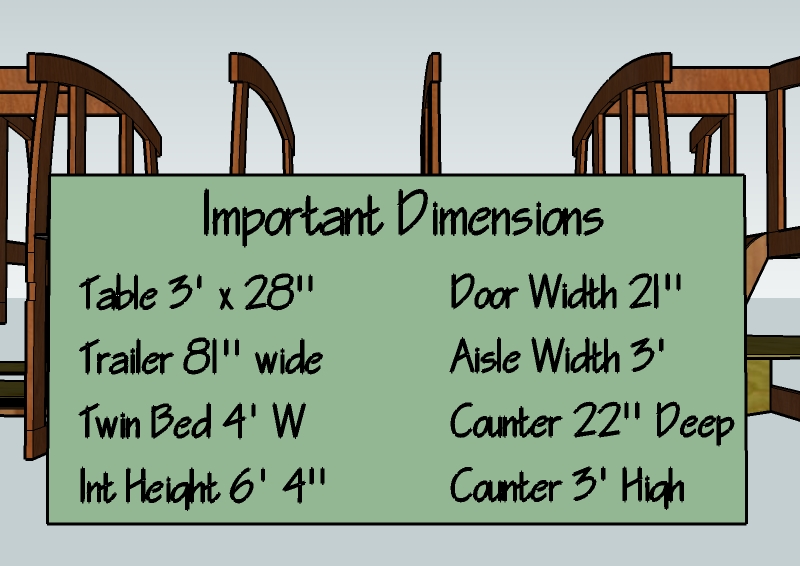
Here are a few other dimensions from our trailer. These certainly aren’t set in stone but they are dimensions that we’ve lived with while camping in our trailer.


I’ll end this entry with a video tour of my boat. The first half of the video shows the single bunks in the rear. It then transitions to the twin bed configuration. There’s so much more to do, but I’m sure pleased with this chance to explore ideas and solve problems without wasting wood.

Larger Video

I may feature some web sites and books in my next journal entry. Keep an eye out ;-)

“Two weeks on the river and I was only fifty miles upstream. My wake, had it been recorded, would have revealed a slow, wandering track of curiosity – islands explored, old townsites discovered, and unnamed channels followed. I had left footprints on sandbars, and on mudbanks I had left the imprint of the boat’s keel. These things, the small unexpected adventures, are the best part of a journey.”

Sam McKinney,

from Reach of Tide, Ring of History

Wednesday, February 18, 2009

The Joli Wee Spark

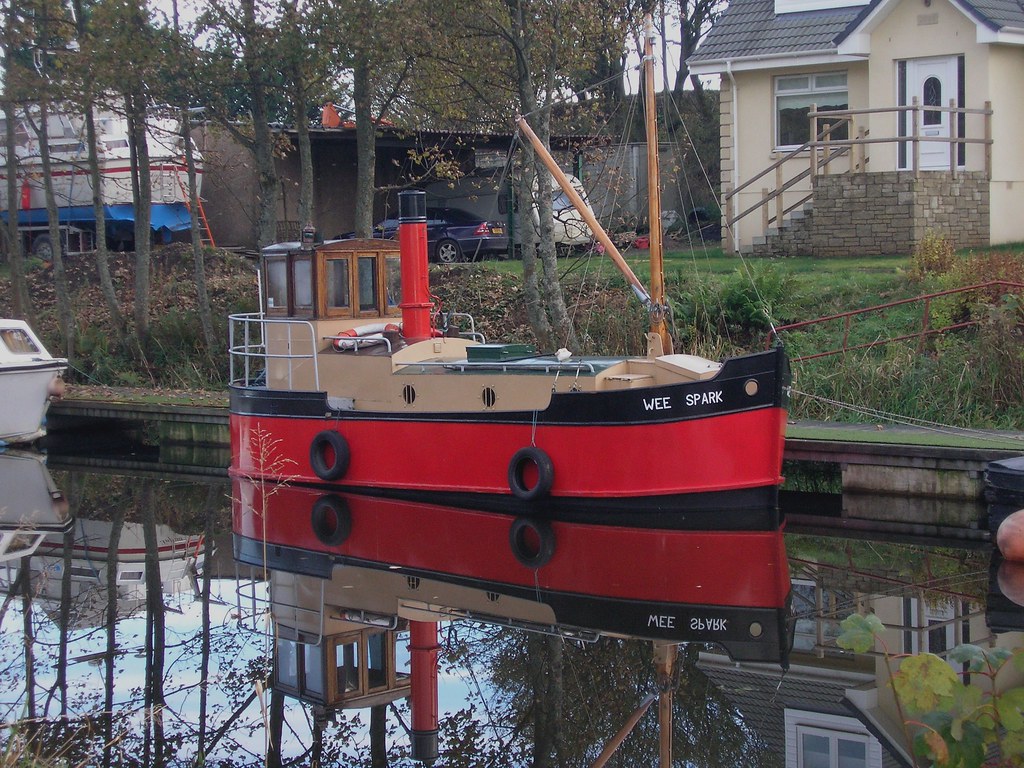
I’ve worked a little with the floor plan of the Joli to see if I could make it look a little more like a nautical boat. I’m using the basic hull shape from the Wee Spark that I introduced to you during our last visit. 

I tried to work within the confines of my revised frame locations based on my extended length version of the Joli. I left the original width on as many frames as possible and only the ones on the end get modified.

It looks like the rounded transom will work fine as it still hides the outboard motor. The rear bunks get narrower right towards the foot end, but that should be fine.

The bunks in the front are more severely affected by this hull shape change. The forward bunks are now a modified V berth. I did lose some overall width but I think they’re still within reason. It looks like they will tuck under the front ladder. 

Larger Video

I may be exceeding the abilities of Sketchup with this modified shape so I’ve downloaded the newest free version of DELFTship and may try again to learn this software. It really is a better tool for boat designing. We’ll see. Here’s a version of the Clyde Puffer done with DELFTship. The Puffer is the original ship that the Wee Spark is based on.

Here’s another example of what is possible in DELFTship.

I haven’t given up on Sketchup yet. Look at how complex this hull shape is. I guess I need a little more practice ;-)

Now let me complicate the options a little further. There is also a program called FREE!ship. This software is produced by the original developer of DELFTship, Martijn Van Engeland. There is a nice tutorial at the Wooden Boat Forum if you’re interested in pursuing this further. Here is another tutorial for FREE!ship.

It also seems that models built in DELFTship or FREE!ship can be exported and used in Sketchup. See an example here

Wow, so much to learn!

Wednesday, February 11, 2009

Hull Shape

The Joli is shaped like a barge or a scow. This has at least two great advantages. It’s easier to build with flat sides and a flat bottom as well as providing enormous interior space. Ok, maybe enormous is a bit of an exaggeration, but compared to lets say a sailboat, the Joli has much more room in the same 23 feet.

I am concerned however, about two things that I see as a disadvantage. A flat bottom hull doesn’t move through the water but rather over the water. This tends to create a slapping sound when encountering waves. Now I know that Philip designed the Joli boat for calm waters so this may not be an issue. I plan to use the boat for camping at our many mountain lakes here in Central Oregon. I also intend to do some cruising on our larger rivers in Oregon, However; even on lakes and rivers, I’ll encounter waves from wind, tides, current, and other boaters. This slapping sound may interfere with an otherwise relaxing weekend. Secondly, and perhaps less important, has something to do with vanity. I want people to admire my “Yacht”. I think it should look like a “real” boat. Now this may not be fair to Mr. Thiel at all and it might reveal a character flaw on my part, but there it is, out in the open.

So what! Do I try to do something about this? Why make it harder to build? Why take away precious interior space? Because of this wonderful boat that Bryan Lowe found for me:


I just love how this boat looks. It makes me smile inside and out. I can just imagine how wonderful it would be to motor around in the Wee Spark. Could I modify the Joli hull somewhat to resemble this scale replica of an old canal workboat? Maybe I should start with Philip’s newest design, the Friend-Ship.

Larger Video

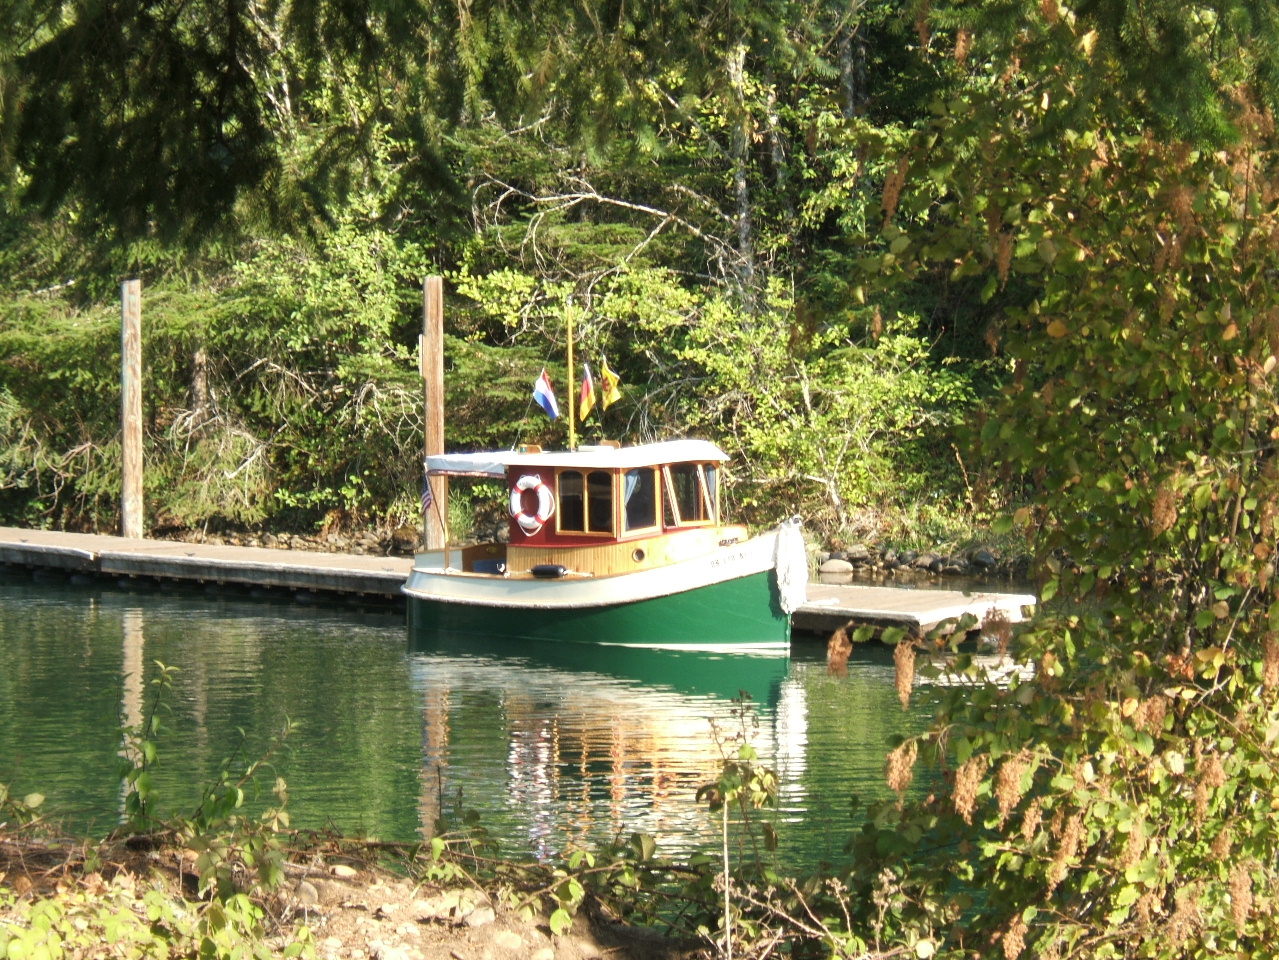
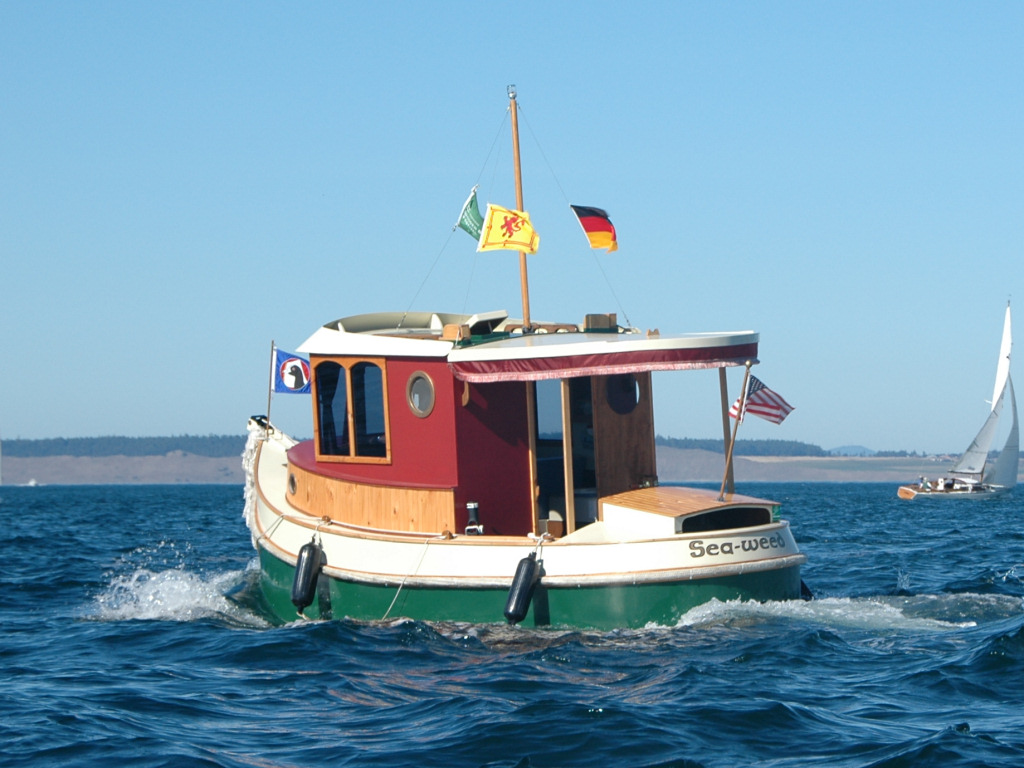
Maybe the bottom of the Joli can be left fairly flat but the sides could taper in to the bow. And maybe the transom could have a tight curve that would hide the outboard motor. Dick Mitsch built a wonderful mini tug using an idea like this. There was a great article in the Mar/Apr 2008 issue of Small Craft Advisor about Dick’s tug Sea-Weed.


Dick designed this boat himself based on, “how she should look”. He sketched it out on a piece of brown wrapping paper and then started building. She looks great in the water and she’s winning the hearts of her admirers. Now I’m not proposing that we can all go out and design our own boat, but in this case it worked out great. It turns out the boat is pretty seaworthy. Dick found this out one day while cruising on the Columbia River. A big 45 foot yacht went by at full speed which left Dick in its three-foot wakes. The tug handled it just fine.

Looks like I better get back to the drawing board. Let’s see what I can come up with for a hull modification on the Joli.

Just a quick note of thanks to the people that have taken such wonderful pictures for us to enjoy on the internet. It really is amazing and we owe them a debt of gratitude. Thanks!

Monday, February 9, 2009

A Floor Plan in Sketchup

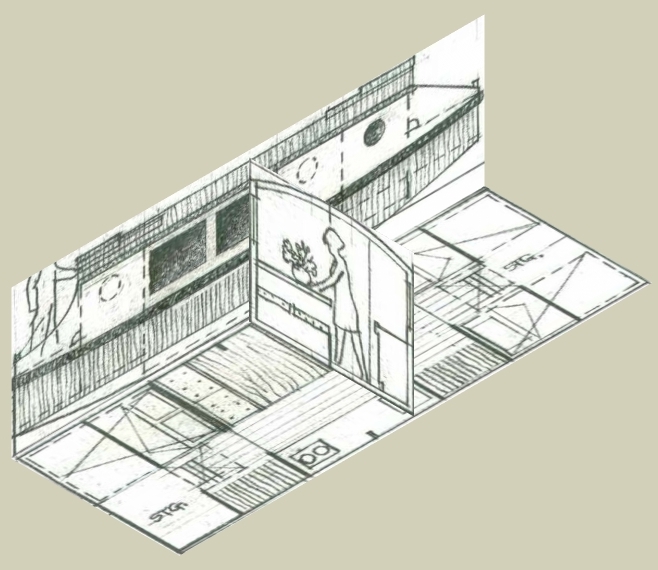
I decided to work at this boat idea from a different angle this time. I’m going to start working on a floor plan in Sketchup. This will make it easier to place 3 dimensional items later on. It will also give me a chance to work on the single beds in the back.

It turns out that the dinette in Philip’s original drawing is about 44 inches wide. I checked in our Vintage Camp Trailer, and found out ours is only 36 inches wide. I think this might help in making the rear bunks into singles. Also, If I cut the rear dinette bench at an angle, It makes it even easier. A narrower table also opens up the walkway in the kitchen/dinette area. This will help with traffic flow through the center of the boat.

Larger Video

Unfortunately, if I make single bunks in the rear, I will lose the rear closet. This may be a problem since storage is at a premium in a boat. Who knows?

Larger Video

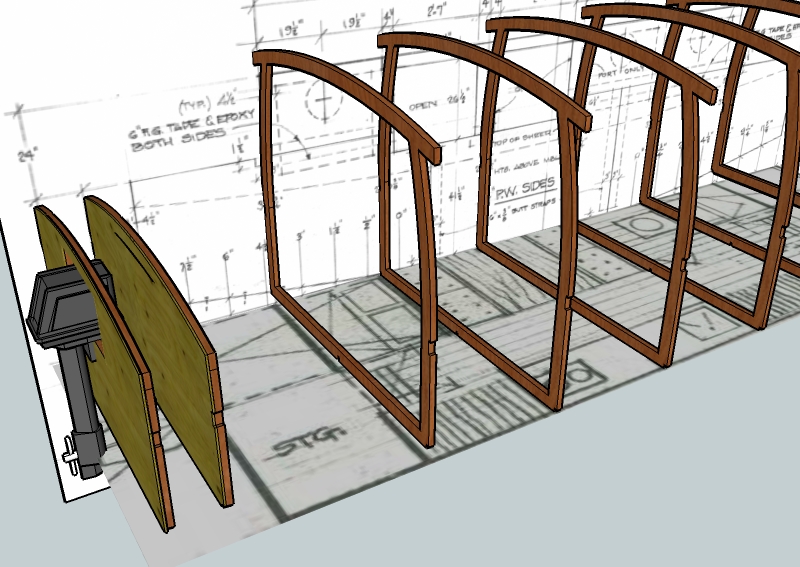
The video above shows how I can start placing frames using the floor plan in Sketchup.

Stay Tuned!

Saturday, February 7, 2009

A Little More Room and a Twin Bed

It's interesting to me how I have to see something before I figure it out. Maybe that is why this whole virtual build works for me. I can’t imagine how much time and wood I would waste while I tried things that I thought would work.

First example today is my thoughts for two single bunks instead of a twin bed in the rear of the boat. We have a twin bed in the back of our vintage camp trailer. I don’t like the idea that the person on the far side of the bed, the side against the wall, has to climb over the other person to get out of bed. There’s no good way to do this without waking up your partner.

I also felt that four single bunks and a dining table that converts to a bed would be more versatile for guests. Maybe three of my buddies and I want to go on a fishing trip. Who is going to end up sleeping together on a narrow 3 foot 6 inch twin bed? Not a pretty picture ;-)

It wasn’t until I played around with the Joli floor plan sketch that I realized the single beds wouldn’t work. The companionway ends up with a tight, narrow jog. It’s almost like Philip knew what he was doing. Big Grin!

I haven’t given up on the four single beds idea, I just need to work on it some more, but there may not be a good fix.

The next area of concern for me was the exterior cockpit length. It seemed really short, especially the way I have the outboard configured. My last entry gave a little hint of how I want to do the outboard. I’m hoping it will end up with a wooden cover over it to further hide the source of propulsion.

I figure that at a minimum, I want two people to be able to sit comfortably side by side on the cockpit benches, or one person should be able to recline with their back against the cabin wall with legs stretched out on the bench. It turns out that I’m closer to that size than I thought. I measured the love seat in our living room and came up with 4 feet of length. I won’t need to add much to the overall length of the boat at all, certainly within the 10% that many people have discussed as the safe range of modification.

Well, I’m guessing a little on the space that is required for the outboard, but it looks like the boat would be 25.5 feet long. This would end up being 6 inches longer than the 10% increase that people say is a safe margin. Can we live with 6 inches over? We’ll see.

More to come.

Friday, February 6, 2009

A Study in Shape

I’ve been having fun putting some shape to my ideas. It’s exciting to start to see some of the things I’ve been dreaming about.

The videos speak for themselves really. I won’t have much to say for this entry.

I haven’t worked in any detail yet, but I wanted to have some general shapes to start working with.

Larger Video

I’ve had some concern about the exterior space available on the Joli. The front and rear cockpits are only about 3 feet long. This seems somewhat crowded and I believe it needs to be revisited. I’m just not sure where to gain space. I like the dimensions available inside so I don’t think I can gain much there, and yet I’m not sure that I want the boat to be longer than about 23 feet. This will need some more thought.

Larger Video

I’m going to continue sketching out some general ideas to start seeing how things fit together overall. I’ll be able to come back to these drawings when I start building my virtual frames.

See you soon.