TUESDAY, DECEMBER 16, 2008

OK, before you get all over me about being in the "real" world, just give me a minute to explain ;-)

I bought a set of plans for the Joli boat from Philip Thiel. Unfortunately, this is not the right "season" in my life to really start building a boat. So, should I just wait and dream, or should I make some kind of forward progress?

My intent here is to keep a journal of my progress. I'll be using Google Sketchup to build my virtual boat. I'm sure that along the way I'll run across problems that need solving, trouble keeping on task, and moments of inspiration.

I'll include pictures and video as I progress. Click on any picture if you'd like to see it larger.

Maybe I'm crazy, but follow along and see what you think

Saturday, January 24, 2009

The Garage, More Than A Boat Shop

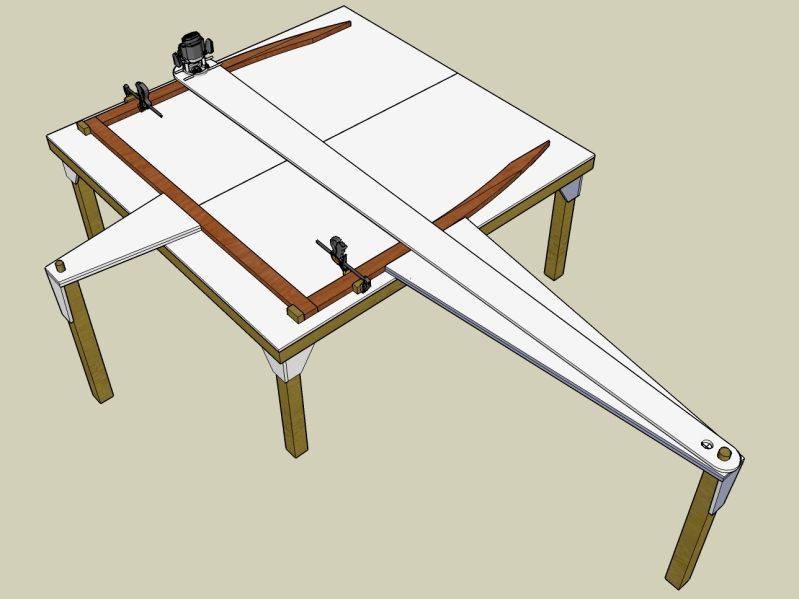
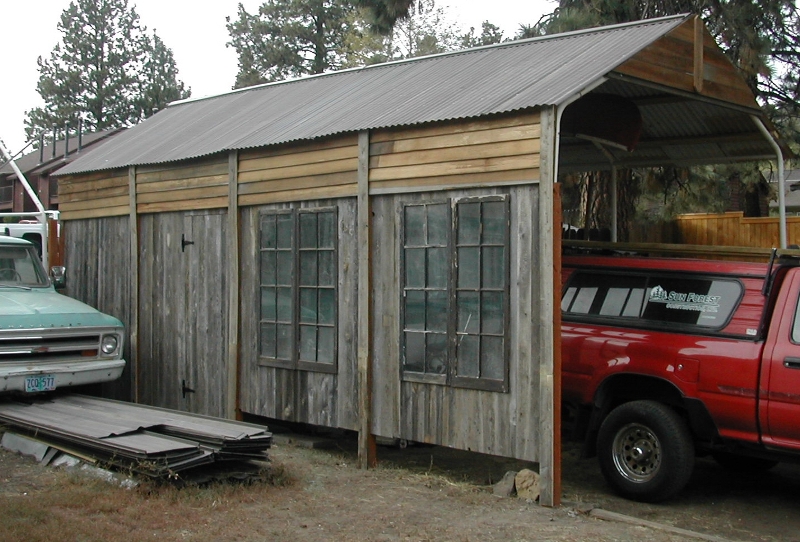
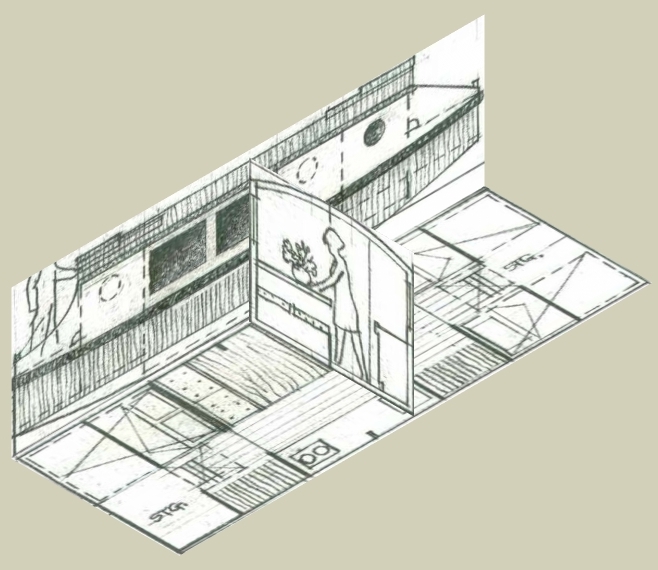
Well, I’ve done some modifying to the assembly table. As you can see, the garage is going to be crowded with this table in place. I needed to figure out what I could do with it when it wasn’t being used.

Larger Video

I rotated the table around 180 degrees and moved it closer to the garage doors. I also decided that the best place for the table when not in use would be hanging from the rafters but since I’ve built my table taller than the original design, the legs would be hanging down and creating some real skull crunchers! I needed to make the legs fairly easy to remove. The video below shows the solution that I came up with. Folding legs seemed too complex so I went for some leg pockets.

Larger Video

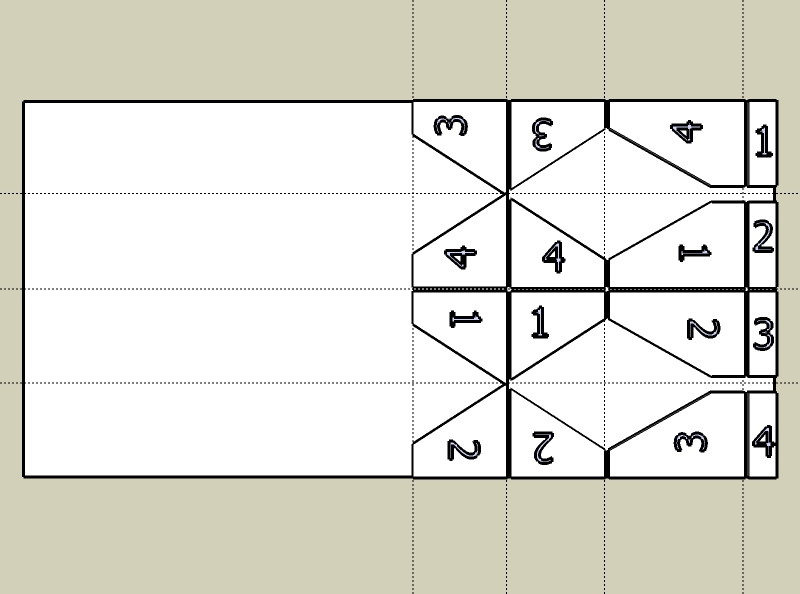
I realized that Sketchup allowed me to play with cuts and assemblies to make a part stronger as well as helping with more efficient use of material. You can see from the picture below that I can get all of the parts I need for the leg pockets out of a 4x4 sheet of ¾" melamine. I laid out the pieces so I could make long cuts with a Skilsaw and then finish cut to size on the table saw.


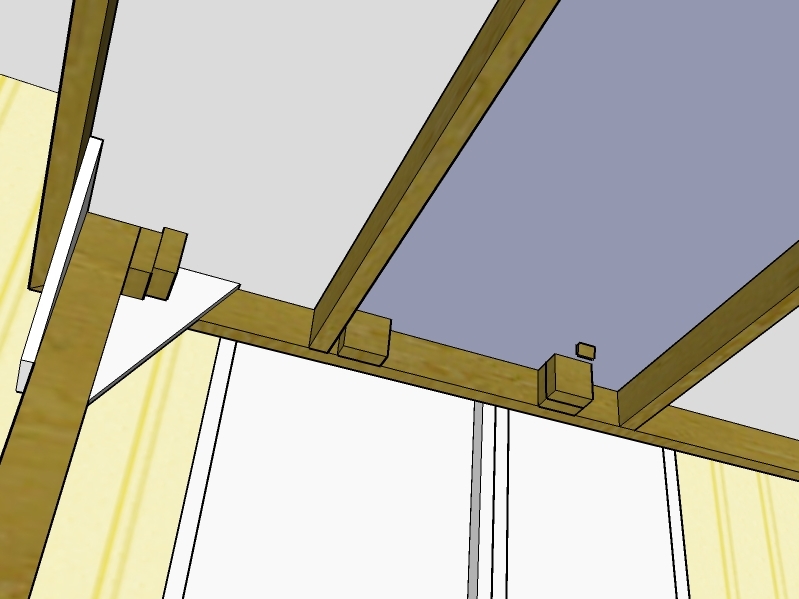
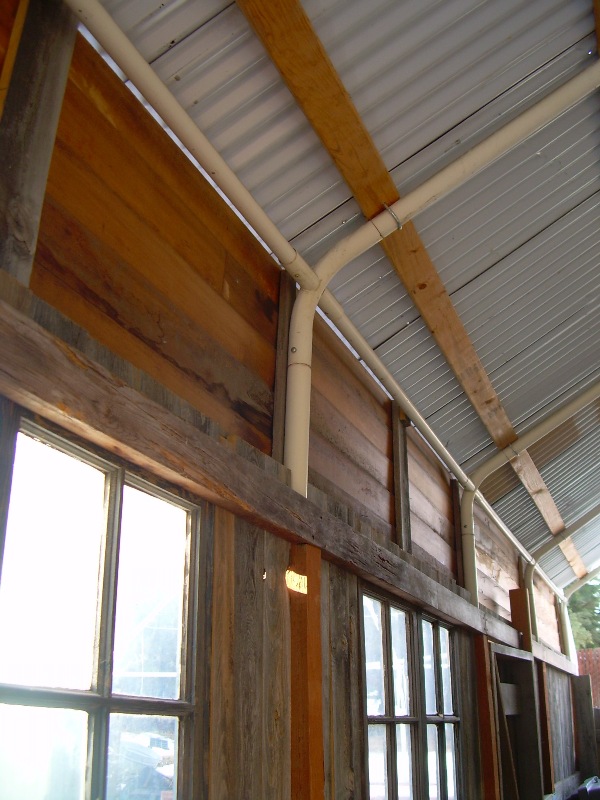
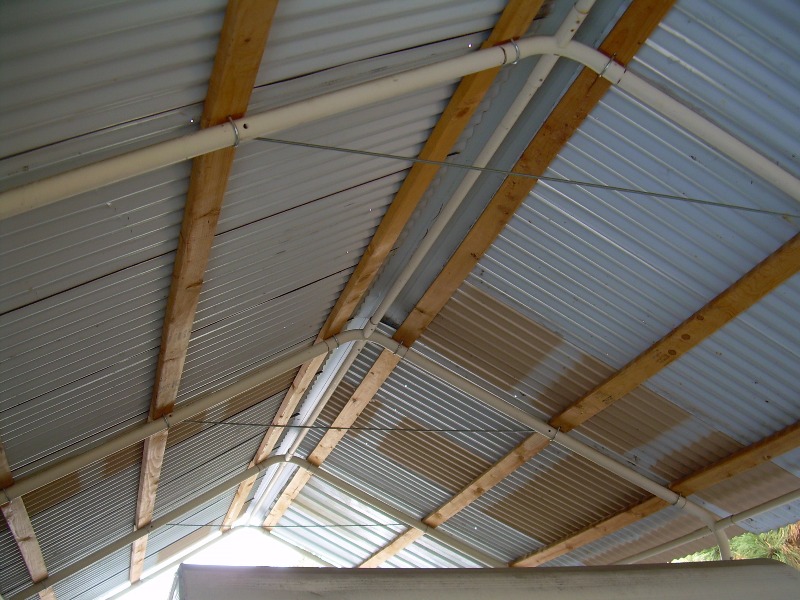
I reinforced the roof trusses in the garage to handle the weight of the table. Trusses are not designed to have things hanging from them. They are engineered to support the weight of the roof pressing down as well as keeping the walls from pushing out. I built supports that transferred the weight of the table across many trusses and also connected this to the upper webs of the truss. I also built a pulley system that made it easier to raise and lower the table.

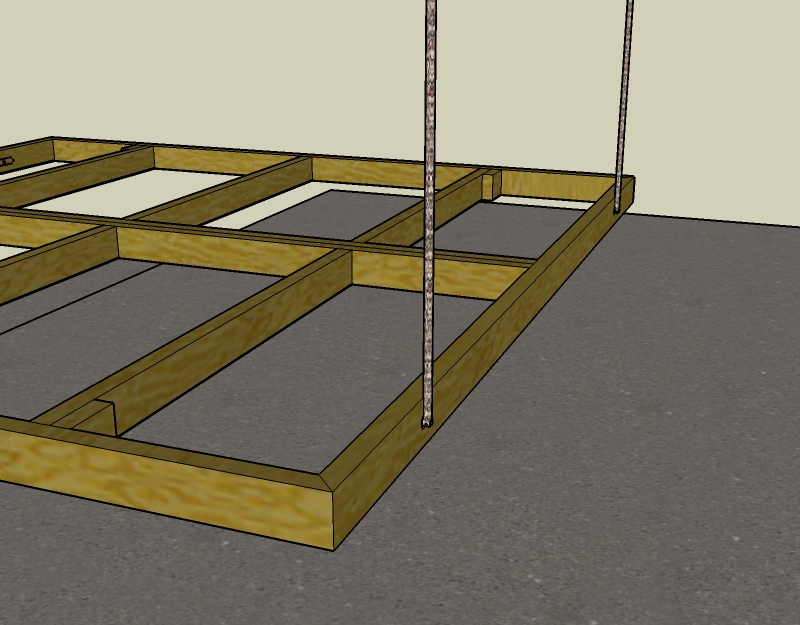
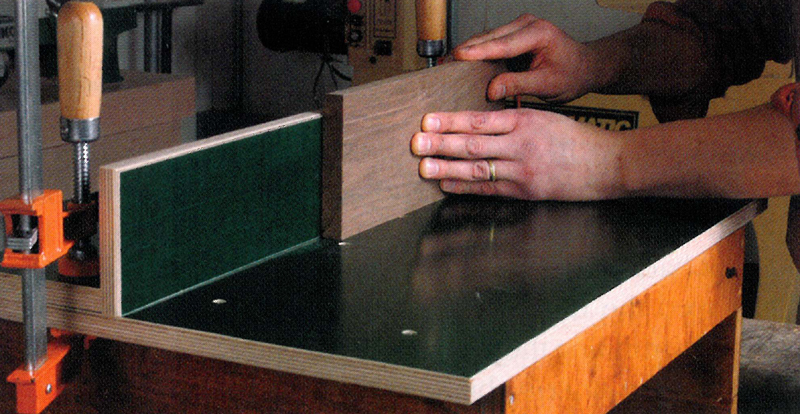
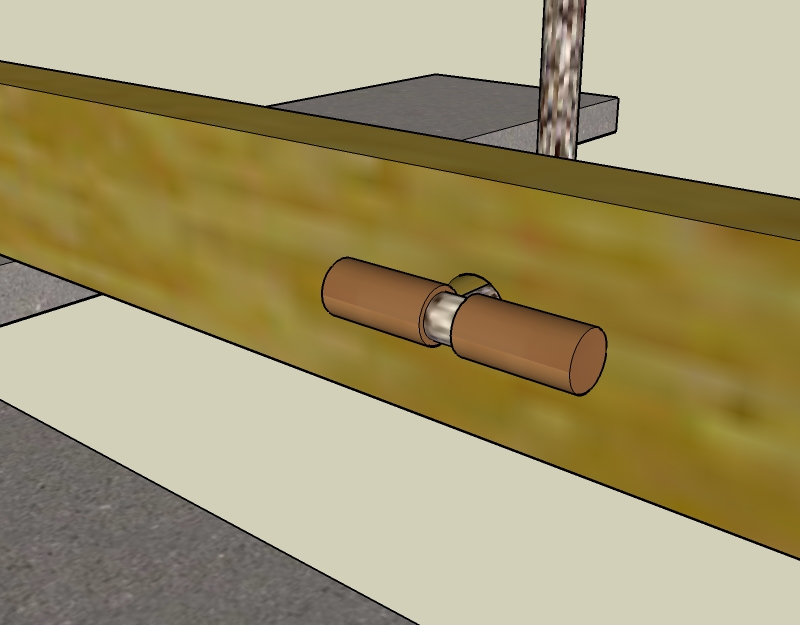
I didn’t want too many things sticking out from the side of the table so I drilled four holes in the outside frame. I used some 1/4” line that is tied to a round dowel with a groove in the center. Just push the dowel through the hole and then turn it crosswise. It can’t slip back through. I had a little trouble drawing the line and the dowel, but I think you get the idea.

Well, here’s where a little trouble developed. I made some of the same mistakes in my virtual world as I do in my real world. This might be a turning point for how I write these blogs. Up to this point, I’ve completed a blog entry much like a chapter in a book would be. I spend a week or two working through drawings, ideas, photos, and wording and then I present it in its finished form. I think I’m going to start sharing the process in more detail. The blogs won’t be completed “chapters”, but rather little snippets of the struggles, mistakes, and solutions that I’ve come up with during this process.

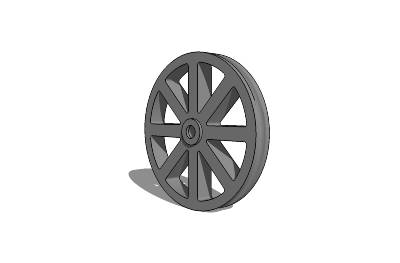
The first thing I did was to lay a 2x4 on edge across the top of my garage trusses. Then I went on my virtual shopping trip to find some pulleys that might work for the table. For Sketchup, that means a trip to the Sketchup 3D Warehouse. This is a wonderful place to go “shopping” for ideas and models for Sketchup. I found a pulley that would work with some slight modification.


It wasn’t until I started threading my rope through the pulleys that I realized that my initial plan wouldn’t work. How would I route the rope to a winch?

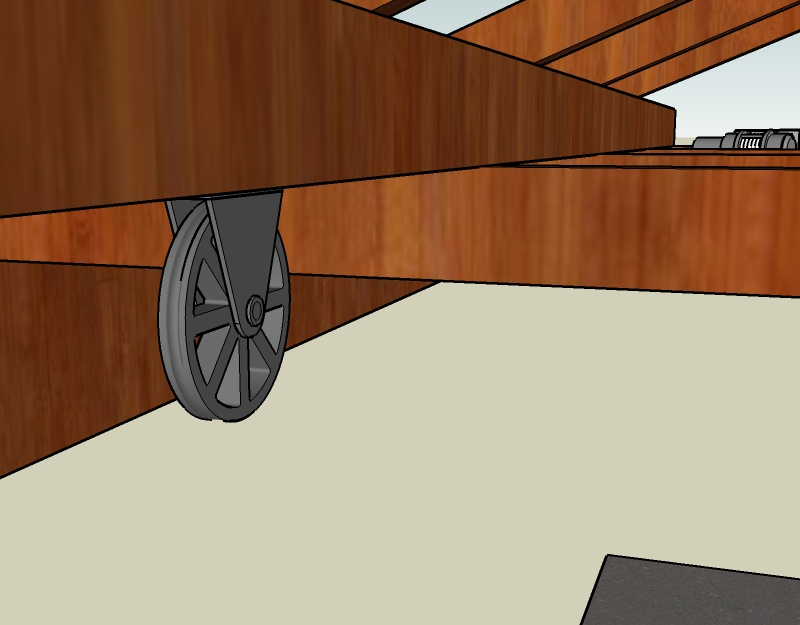
As you can see, there’s no way to get the rope above the trusses. I added a 2x4 laying flat under the vertical one but that still didn’t totally solve the problem. I had to angle the pulley so the rope would clear the 2x4 spacer.

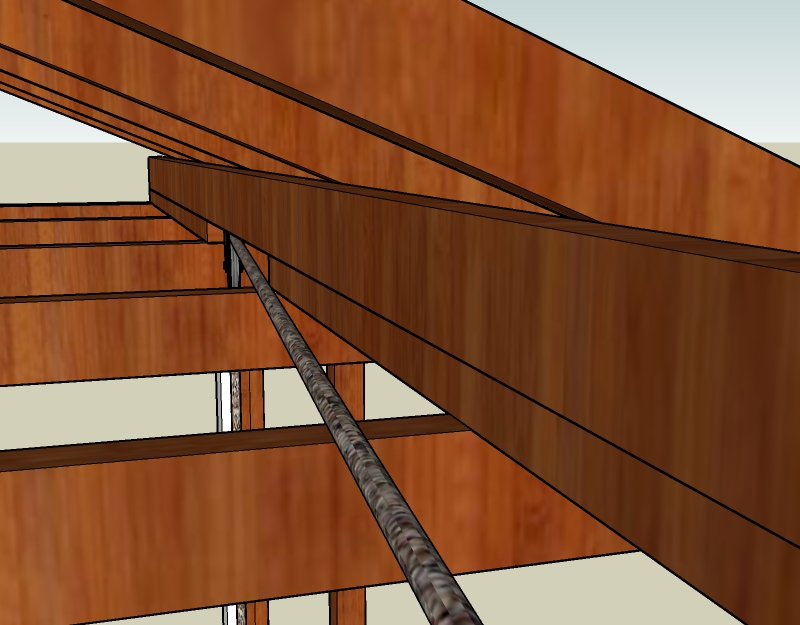
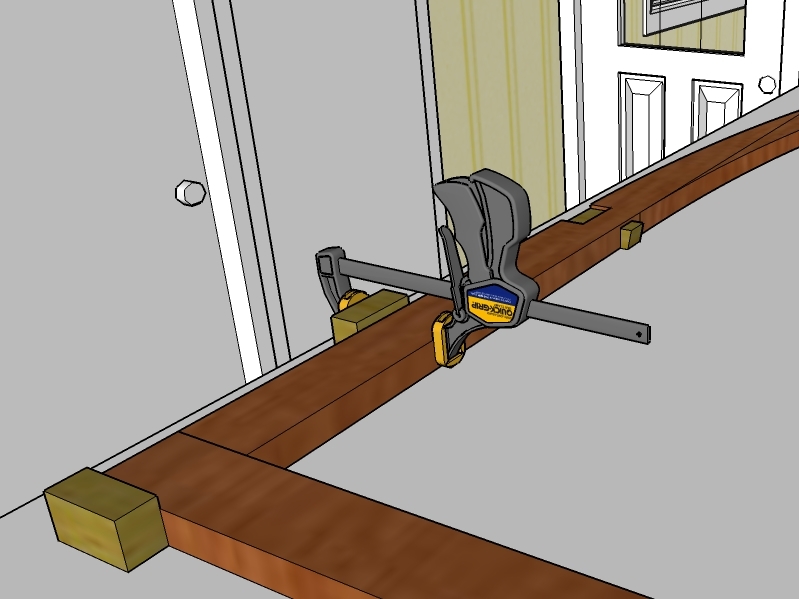
This solved some problems but created new ones. Now look at the goofy angles that the rope hits the winch. I had to put in some big spacer blocks behind the winch to get it to line up better but I bet the difference in angles between the front and rear ropes will be too much.


Now it’s back to the drawing board.

More later ;-)

Saturday, January 10, 2009

The Table is Finished (or is it?)

Larger Video

As you can see in the video above, the table is complete and it’s sitting in the garage. I’ve actually got a frame started on the table, but I’m getting a little ahead of myself. It’s in place to help demonstrate how I intend to use the table. 

In my mind, the key to a straight Joli boat is consistent frames and then a straight, flat surface to assemble on. Let’s get started with building a table to help assure consistent frames. 

This table may be over-built and in fact should probably be used for more than one Joli boat, (maybe that is something we can talk about in the future). The frame work for the table will be 2 x 4 material. Maybe I can find framing lumber that is straight and true enough or maybe there is some manufactured material that will be better for this. 

The top could be ¾” melamine, or something new I ran across in the May/June 2008 issue of Fine Woodworking called Phenolic Plywood. This is Baltic Birch plywood with a thin coating of phenolic resin. It has superior strength and flatness compared to other plywoods. 

You can see in the pictures below that my Joli table has 2 x 4 alignment pins at key locations. It turns out that the size of the frames are actually determined by the table size. The top surface will be 8’ square. 


There is a 2 x 4 frame running under the edge of the table and the pin attaches to that frame. So, the widest portion of the Joli frame ends up being 8’ minus the 1 ½” from each side for a total width of 93”.

I tried to find a location on the frames that runs the full length of the boat that would represent the zero line. Each frame has a set distance above this and below this line. If I cut the notch in the frame first and then set it into the jig, I can then use the jig to cut my lengths. I would use this notch later during boat assembly.

The jig table is also used to cut the curved roof beams. This will be done with a router attached to a long arm that pivots on the far end. In my case, I also talked about having curved cabin sides. I would also do this with a router and long arm. Again, I think this assures greater accuracy when cutting out the parts of the frame. The pivoting arms would have multiple holes on the pivot end for cutting the outside or the inside of the curve.


I’m re-thinking my table design a little now that I’ve got one built. Oh the joy of a virtual build ;-) Now is the time to figure some of this out. I built the table 40” tall. This seemed like a nice workbench height but it will make it tough to reach toward the center of the table. What if the middle of the table was cut out? They use this technique on model railroads to allow access to things that are too far from the outside edge.

So either the next entry will involve making some Joli frames or rebuilding my jig table. We’ll see.

On a technical note, I’m still working on a way for the reader to view the videos in a higher resolution and larger size. I've added a link below the videos that points to my Flickr site. It's not the perfect solution, but better than the embedded videos. I think this will make it easier to view some of the detail that I’m trying to show. It seems to work well for any of the pictures on the blog. I’ve also added an e-mail link to the site. It is a hotmail address in case there are some issues with spam, but if you write to me using that link, I’ll write back to you from my gmail account. I’d love to hear from you.

Thursday, January 1, 2009

Do I have Somewhere to Build a Boat?

Here I am with a small 50’ x 100’ lot in town. Our house is 950 sq ft. It doesn’t take much math to figure out that I don’t have much room left for building a boat.

I fired up Sketchup on the computer to see what I could do with the room I have. There are a couple of things you should understand about Sketchup. Here’s an excerpt from Google Sketchup for Dummies. Sketchup is a “surface” modeling tool. That means that everything is made up of thin (infinitely thin, actually) surfaces. These are called faces. Even things that look thick (like cinder-block walls) are actually hollow shells. Making models in Sketchup is a lot like building things out of paper – really, really thin paper.

Here’s a portion of our house built with Sketchup. I drew in the details to demonstrate the possibilities as well as challenge my skill level. I also created scenes to build an animation. I think this will be an easier way to communicate my ideas rather than using static images.


I have room in the back yard for building a shed. It has access from the parking lot behind our house as well as from the side street. The downside is that the driveways are pretty steep. It may be hard to get a boat in and out. Here’s what a shed would look like. I’ve also included additional “features” that would make this project more appealing to my wife, a very important consideration ;-)


Larger Video

Well, I fudged a little; I’ve already built the shed. I started with the portable sheds you can get from Costco. I used the angled roof trusses on top of 10’ 4x4 posts buried in concrete. I had enough pieces to build a shed that is 10’ x 24’. I helped a friend tear down his old shed and salvaged the roofing and siding for my shed. Right now our Vintage Oasis Camp Trailer is stored in there, so I’d need to find a new place for the trailer if I wanted to build a boat in the shed.


When we built our house, we added a carport out front. I think it would be fairly easy to enclose this carport with walls. Unfortunately the covered area is only 18’ long. Not enough to assemble a 23’ Joli boat. The carport does have a 6’ x 12’ storage area at the front so maybe I could tear out the doors and wall that separates this from the carport. The problem is that we’re using that area for a freezer and other storage. I don’t think we could give it up.

The carport is 12’ wide so I think that would work for a boat that is 8’ wide. Not a lot of extra room, but doable. I could increase the width by 2’ by building out to the outside end of the overhang. This would be a great place for tools and a workbench.

Here’s what that might look like.


Larger Video

 Ok, I fudged a little again; I’ve already started enclosing the carport. I still need to pour an additional 2’ of slab on the side so I can build the wall on the left side of the garage. That will be a project for this coming summer after the ground thaws.

I suspect that I will end up building the frame assembly table and frames in the garage and then move out to the boat/trailer shed to assemble the frames into a boat. Building frames would be a great winter project because I could insulate the garage and keep it warm. Assembling the frames into a boat would be a better summer project because the shed is fairly open.

Next step is to build my virtual assembly table in my virtual garage.